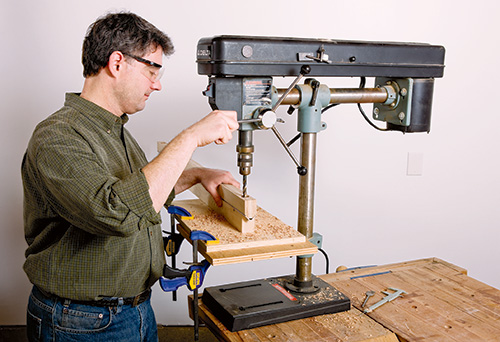
Have you ever found yourself struggling to tighten the chuck on your drill press? Or maybe you’ve encountered the frustration of a worn-out chuck that needs to be replaced? In this blog, we will guide you through the process of tightening and replacing the chuck on your drill press, offering helpful tips and step-by-step instructions to ensure smooth and successful operation. Whether you’re a seasoned DIY enthusiast or just starting out, this article will equip you with the knowledge you need to tackle this common challenge and keep your drill press in optimal working condition.

This image is property of pixabay.com.
Understanding Drill Press Chucks
A drill press chuck is an essential component of a drill press. It is the part that holds the drill bit securely in place and allows for precise drilling. Understanding the different types of drill press chucks and the importance of a secure chuck is crucial for anyone working with a drill press.
Types of Drill Press Chucks
There are three main types of drill press chucks: keyed chucks, keyless chucks, and collet chucks. Keyed chucks require a chuck key to tighten and loosen the chuck, while keyless chucks can be operated with a simple twist. Collet chucks are specialized chucks used for holding smaller drill bits and are commonly used in woodworking and metalworking.
Importance of a Secure Chuck
A secure chuck is vital for efficient and accurate drilling. A loose chuck can cause various problems, including wobbling of drill bits, inconsistent drilling depth, and difficulties in removing bits. These issues can lead to imprecise drilling, damaged workpieces, and even pose a safety hazard. Therefore, it is essential to regularly check and tighten the chuck to ensure optimal performance.
Signs of a Loosening Drill Press Chuck
Identifying the signs of a loosening drill press chuck is crucial in maintaining a safe and effective drill press setup. Here are some common indications that your chuck may be loosening:
Wobbling of Drill Bits
One of the primary signs of a loosening chuck is the wobbling of drill bits during operation. If you notice that your drill bits are not spinning smoothly and instead exhibit a wobbling motion, it is likely that the chuck needs tightening. This wobbling can reduce drilling accuracy and result in uneven holes.
Inconsistent Drilling Depth
A loosely tightened chuck can lead to inconsistent drilling depth. You may notice that your drill bits do not consistently reach the desired depth, resulting in uneven holes or incomplete drilling. This can be frustrating and time-consuming, especially when working on projects that require precise drilling.
Difficulties in Removing Bits
When a chuck is not secured tightly, removing drill bits can become challenging. You may find that the bits get stuck in the chuck, making it difficult to replace or switch to different drill bits. This can be problematic when working on multiple drilling tasks or when adjusting the drill setup for different projects.
Steps for Tightening a Drill Press Chuck
Tightening a drill press chuck is a simple process that can be done in a few steps. By following these steps, you can ensure a secure chuck and maintain optimal performance:
Preparing the Drill Press
Before tightening the chuck, it is important to turn off the drill press and disconnect it from the power supply. This ensures your safety and prevents any accidental drilling while working on the chuck.
Inspecting the Chuck
Inspect the chuck visually to check for any obvious signs of wear, damage, or debris. Ensure that the chuck is clean and free from any dirt or debris that may interfere with tightening. If you notice any significant damage or excessive wear, it may be necessary to replace the chuck instead of tightening it.
Using a Chuck Key to Tighten
For keyed chucks, insert the appropriate chuck key into the chuck and turn it clockwise to tighten the chuck. Apply sufficient force to ensure a snug fit but avoid overtightening, as this can damage the chuck or cause other issues. Make sure the chuck is securely tightened and does not exhibit any wobbling or movement.
Testing the Tightness
After tightening the chuck, test its tightness by gently grabbing the drill bit and attempting to move it side to side. There should be minimal to no movement if the chuck is tightened correctly. If the chuck feels loose or the drill bit moves significantly, repeat the tightening process until the chuck is securely in place.
When to Replace a Drill Press Chuck
While tightening a drill press chuck can solve many issues, there are instances when replacement is necessary. Here are some signs that indicate it may be time to replace your drill press chuck:
Excessive Wear and Tear
If your drill press chuck shows signs of excessive wear and tear, such as visible damage or deteriorated components, it may be time for a replacement. Over time, the internal components of the chuck can wear out, leading to a loose or ineffective grip on drill bits.
Damaged or Stuck Chuck Key
A damaged or stuck chuck key can make it difficult or even impossible to tighten or loosen the chuck. If your chuck key is bent, broken, or no longer fits snugly in the chuck, it is best to replace the chuck to ensure proper functionality.
Inability to Secure Bits
If your chuck consistently fails to securely hold drill bits, even after tightening, it may be a sign of irreparable damage or wear. This can compromise the accuracy and safety of your drilling operations, making replacement the best option.
Types of Replacement Drill Press Chucks
When it comes to replacing a drill press chuck, there are a few options available. The type of chuck you choose will depend on your specific needs and preferences. Here are the main types of replacement drill press chucks:
Keyed Chucks
Keyed chucks are the traditional type of drill press chucks that require a chuck key to tighten and loosen the chuck. They offer a secure grip on drill bits and are suitable for most drilling applications. However, they require the use of a chuck key, which can be less convenient than other types.
Keyless Chucks
Keyless chucks are becoming increasingly popular due to their convenience and ease of use. They can be tightened and loosened with a simple twist, eliminating the need for a chuck key. Keyless chucks are quick and efficient, making them ideal for users who frequently change drill bits during their work.
Collet Chucks
Collet chucks are specialized chucks designed for holding smaller drill bits and are commonly used in woodworking and metalworking. They provide a firm grip on the drill bit and ensure precision drilling. Collet chucks come in various sizes to accommodate different drill bit diameters.
Choosing the Right Replacement Chuck
When selecting a replacement chuck for your drill press, there are several factors to consider. Here are some key considerations to help you choose the right chuck:
Compatibility with Drill Press
Ensure that the replacement chuck is compatible with your drill press model. Check the specifications and measurements to ensure a proper fit. Choosing a compatible chuck will ensure smooth operation and prevent any issues with installation.
Capacity and Size
Consider the capacity and size of the chuck based on your drilling needs. Ensure that the chuck can accommodate the drill bit sizes you commonly use. A chuck with a larger capacity will provide more versatility and allow you to work with various drill bits.
Quality and Durability
Opt for a replacement chuck that is made from high-quality materials and offers durability. A well-built chuck will provide a secure grip and withstand heavy use without loosening or wearing out quickly. Reading customer reviews and selecting reputable brands can help ensure the quality and longevity of the chuck.
Removing the Old Chuck
Before installing a new chuck, you need to remove the old one. Here is a step-by-step guide on removing the old chuck from your drill press:
Disconnecting Power Supply
As with any work involving a drill press, start by turning off the drill press and disconnecting it from the power supply. This prevents any accidental powering on of the machine during the chuck removal process.
Removing the Chuck Retaining Screw
Using a suitable screwdriver, locate and remove the chuck retaining screw. This screw keeps the chuck secured to the drill press shaft. Carefully unscrew the retaining screw and set it aside for later use.
Using a Chuck Removal Tool
Some drill presses come with a chuck removal tool specifically designed to help users remove chucks. If your drill press includes this tool, insert it into the chuck and tighten it securely. The tool will help provide leverage to remove the chuck from the drill press.
Tapping the Chuck Loose
If your drill press does not have a chuck removal tool, you can tap the chuck loose using a rubber mallet or a wooden block and a hammer. Gently tap on the side of the chuck while holding the drill press firmly, allowing the chuck to loosen from the taper of the drill press shaft.
Installing the Replacement Chuck
Once the old chuck has been successfully removed, you can proceed with installing the replacement chuck. Follow these steps to ensure a proper installation:
Checking Compatibility
Before installing the new chuck, double-check its compatibility with your drill press model. Ensure that the chuck’s specifications match the drill press shaft and other components for a secure fit.
Aligning the Chuck
Carefully align the replacement chuck with the drill press shaft, ensuring that it slots into place properly. Avoid any misalignment or cross-threading, as this can affect the chuck’s performance and potentially damage the drill press.
Inserting the Chuck
Insert the replacement chuck into the drill press shaft, making sure it fits securely and snugly. Apply gentle pressure to slide the chuck in fully, ensuring that it sits flush with the drill press housing.
Fastening the Chuck
Once the chuck is properly inserted, secure it by tightening the chuck retaining screw. Use the appropriate screwdriver to tighten the screw, ensuring that it is snug but not overtightened. This will keep the chuck securely attached to the drill press shaft.
Testing the New Chuck
After installing a new chuck on your drill press, it is important to test its performance before using it for any drilling tasks. Here are some tests you can perform to ensure the new chuck is functioning properly:
Testing Holding Power
Insert a drill bit into the new chuck and tighten it securely. Gently apply some pressure on the drill bit from different angles and check if the chuck holds it firmly. There should be no significant movement or slipping, indicating that the chuck has a strong grip.
Drilling with Different Bits
To test the versatility of the new chuck, try using different sizes and types of drill bits. Make sure the chuck can securely hold each drill bit and allows for smooth drilling without any wobbling or misalignment. This test will help determine the chuck’s performance under different drilling scenarios.
Checking for Smooth Operation
During operation, pay attention to the smoothness and stability of the chuck. The chuck should rotate smoothly without any vibrations or unusual noises. If you notice any issues, such as excessive wobbling or grinding sounds, it may indicate an installation problem or a defective chuck that requires further attention.
Maintenance Tips
To ensure the longevity and optimal performance of your drill press chuck, regular maintenance is essential. Here are some maintenance tips to keep in mind:
Regular Cleaning and Lubrication
Cleaning the chuck regularly helps prevent the buildup of dirt and debris that can affect its grip and performance. Use a soft brush or cloth to remove any dust or particles from the chuck and apply a small amount of lubricant to ensure smooth operation.
Proper Storage
When not in use, store your drill press in a clean and dry area, protected from moisture and extreme temperatures. This will help prevent rust and prolong the lifespan of the chuck and other components.
Avoiding Excessive Pressure
Avoid applying excessive pressure or force when tightening the chuck or using it during drilling. Over-tightening can damage the chuck, while excessive force during drilling can lead to premature wear and tear. Use consistent and controlled pressure when operating the drill press to ensure the longevity of the chuck and achieve accurate drilling results.
By understanding the different types of drill press chucks, recognizing the signs of a loosening chuck, and knowing how to properly tighten or replace the chuck, you can maintain a safe and efficient drill press setup. Regular maintenance and following the recommended guidelines will help ensure optimal performance and extend the lifespan of your drill press chuck.