Maintaining and cleaning your drill press is essential for its longevity and optimal performance. In this article, you will discover the importance of regular maintenance and learn practical tips on how to keep your drill press in top shape. From simple cleaning techniques to checking for wear and tear, this guide will empower you to tackle drill press maintenance with confidence. Whether you are a DIY enthusiast or a professional, taking care of your drill press will ensure accurate and efficient drilling for years to come. So grab your toolbox and let’s get started!
This image is property of www.woodworkersjournal.com.
Regular Cleaning
Cleaning the Surfaces
Regularly cleaning the surfaces of your drill press is essential to maintain its functionality and longevity. Use a mild detergent and a soft cloth to wipe down the exterior of the machine, removing any dirt, dust, or debris. Pay special attention to the areas around buttons and knobs where grime tends to accumulate. For stubborn stains, a mixture of vinegar and water can be an effective cleaning solution. Remember to dry the surfaces thoroughly after cleaning to prevent rust or damage.
Cleaning the Chuck
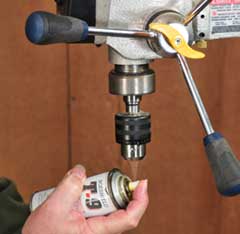
The chuck is one of the most crucial components of a drill press, as it securely holds the drill bit in place. To keep it in optimal condition, regularly clean the chuck after every use. Start by removing any debris from the jaws using a brush or compressed air. If the chuck requires deeper cleaning, you can use a mild solvent or degreaser and a clean cloth to wipe down the jaws. Avoid using excessive force or harsh chemicals, as these can damage the chuck. Finally, apply a small amount of oil or lubricant to keep the chuck functioning smoothly.
Cleaning the Table
The drill press table is where your workpiece rests during drilling operations. It is important to keep the table clean to ensure accurate and safe drilling. After each use, remove any dust or debris using a brush or vacuum. For stubborn residue, a mild cleaner can be used, but be cautious not to damage any table markings or measurements. Additionally, inspect the table for any signs of rust. If you notice rust spots, use a rust remover or fine abrasive pad to gently remove the rust and prevent further corrosion.
Cleaning the Motor
The motor is the power source of your drill press and requires regular cleaning to ensure optimal performance. Begin by disconnecting the drill press from the power source and allowing the motor to cool down. Use a soft brush or compressed air to remove any dust or debris that may have accumulated on the motor housing. Be careful not to damage any electrical components during the cleaning process. If necessary, you can use a slightly damp cloth to wipe down the motor, taking care to completely dry it before reconnecting to the power source.
Cleaning the Belt
The belt is responsible for transferring power from the motor to the spindle of the drill press. It is important to clean the belt periodically to prevent debris build-up and ensure smooth operation. Start by unplugging the drill press and removing the belt cover. Carefully inspect the belt for any signs of damage or wear. If the belt appears dirty or dusty, gently clean it using a soft brush or cloth. Avoid using any harsh chemicals that may damage the belt material. Once cleaned, ensure the belt is properly aligned and tensioned before reassembling the belt cover.
Lubrication
Identifying the Lubrication Points
Lubrication plays a crucial role in the smooth functioning and longevity of your drill press. It is essential to identify the lubrication points to ensure proper maintenance. Refer to the manufacturer’s manual to locate the specific points that require lubrication. Typically, these include the chuck, quill, table elevation mechanisms, and any moving parts within the motor. Proper lubrication helps to reduce friction, prevent wear, and extend the life of these components.
Choosing the Right Lubricant
Selecting the appropriate lubricant for your drill press is important to ensure effective lubrication. Different components may require different types of lubricants, such as oil, grease, or anti-seize compounds. Refer to the manufacturer’s recommendations for the correct lubricants to use. When applying lubricant, ensure that you use the appropriate amount. Over-lubrication can attract dust and debris, while under-lubrication may lead to premature wear and damage.
Applying Lubricant to the Drill Press
Once you have identified the lubrication points and selected the suitable lubricant, it’s time to apply it to your drill press. Start by cleaning the components to be lubricated, removing any existing debris or old lubricant. Apply a small amount of lubricant to each lubrication point, taking care not to over-apply. Use a clean cloth or brush to distribute the lubricant evenly. After lubrication, operate the drill press for a short period to allow the lubricant to spread and reach all the necessary areas. Regularly check and reapply lubricant as needed, particularly if you notice any signs of increased friction or wear.
This image is property of i.ytimg.com.
Inspecting and Replacing Parts
Checking the Belt
Regularly checking the condition of the belt is essential for the proper functioning of your drill press. Inspect the belt for any signs of wear, cracks, or fraying. If the belt appears damaged or excessively worn, it is important to replace it promptly to prevent any accidents or further damage to the machine. Refer to your drill press manual for instructions on how to properly replace the belt. Additionally, ensure the belt is properly tensioned to avoid slipping or unnecessary strain on the motor.
Examining the Chuck
The chuck is a critical component of the drill press, and regular inspection is necessary to ensure its functionality and user safety. Check the chuck for any signs of wear, including tooth damage or misalignment. Make sure the chuck jaws open and close smoothly without any binding or sticking. If any issues are detected, refer to the manufacturer’s instructions for adjusting or replacing the chuck. A properly functioning chuck will ensure the secure clamping of drill bits and minimize the risk of slippage during drilling operations.
Inspecting the Quill
The quill is the part of the drill press that holds and moves the spindle up and down. Regular inspection of the quill is crucial to identify any signs of wear or damage. Check for excessive play or wobbling in the quill, as this can affect the accuracy of your drilling operations. Ensure that the quill lock mechanism is functioning properly and securely holds the quill in place. If any issues are observed, consult the manufacturer’s instructions for adjusting or replacing the quill or associated components.
Inspecting the Table
The drill press table is a key component that requires regular inspection to ensure its stability and accuracy. Check for any signs of warping, cracks, or damage on the table surface. Make sure the table elevation mechanisms, such as the crank or handle, operate smoothly without any obstructions or sticking. Inspect the table markings or measurements for any signs of wear or fading. Any issues with the table should be addressed promptly to ensure precise and safe drilling operations.
Checking the Spindle
The spindle is responsible for rotating the drill bit and plays a vital role in the drill press’s performance. Regularly inspect the spindle for any signs of damage, wear, or misalignment. Ensure that the spindle operates smoothly without any excessive play or wobbling. If any issues are detected, refer to the manufacturer’s instructions for adjusting or replacing the spindle or associated components. A properly functioning spindle is crucial for accurate and efficient drilling.
Adjusting and Aligning
Checking the Spindle Alignment
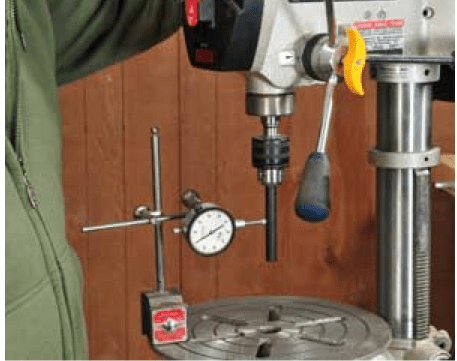
Ensuring the spindle is properly aligned is essential for accurate drilling operations. To check the spindle alignment, use a dial indicator and indicate the spindle while rotating it. If you notice any significant runout or misalignment, refer to the manufacturer’s instructions for adjusting the spindle alignment. Proper spindle alignment reduces the risk of drill bit breakage, improves drilling accuracy, and extends the life of your drill press.
Aligning the Table
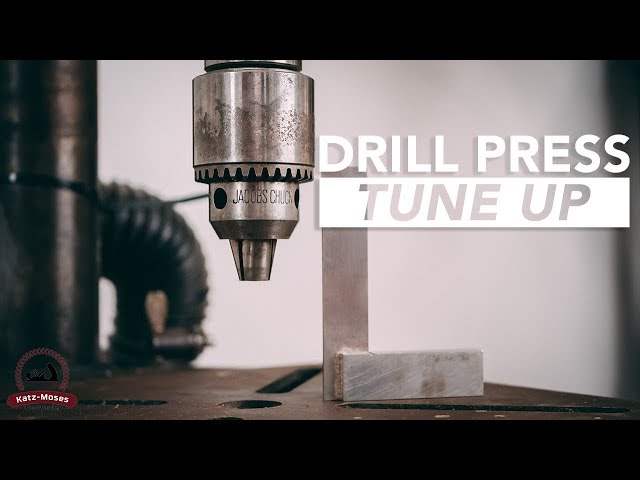
The table alignment is crucial for accurate and precise drilling. Start by adjusting the table to its lowest position and place a drill bit in the chuck. Lower the drill bit until it almost touches the table surface. Rotate the chuck by hand to ensure that the drill bit does not wobble or scrape against the table. If any misalignment is detected, adjust the table using the table elevation mechanisms until the drill bit rotates freely without contact. Regularly check and adjust the table alignment to ensure optimal drilling performance.
Adjusting the Chuck Keys
The chuck keys are used to tighten or loosen the chuck jaws when clamping a drill bit. Proper adjustment of the chuck keys is crucial for secure and stable clamping. Ensure that the chuck keys fit snugly into the chuck keyholes without any excessive play. If the chuck keys are worn or damaged, replace them to prevent any slippage during drilling. Additionally, always remove the chuck key from the chuck before operating the drill press to prevent any accidents or injuries.
Maintaining Proper Tension in the Belt
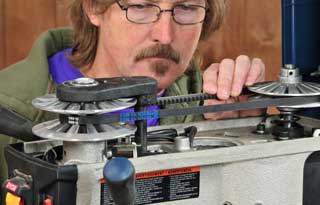
The belt tension is an important factor in the smooth operation of your drill press. Proper tension ensures that power is transferred efficiently from the motor to the spindle. Refer to your drill press manual for the recommended tension specifications. If the belt appears loose or slips during operation, adjust the tension accordingly. Over time, belts may wear out or stretch, requiring replacement. Maintaining proper tension in the belt will optimize performance and reduce unnecessary strain on the motor.
This image is property of www.woodworkersjournal.com.
Safety Measures
Wearing Safety Gear
When operating a drill press, it is essential to protect yourself by wearing appropriate safety gear. This includes safety glasses, hearing protection, and, if necessary, a dust mask or respirator. Safety glasses protect your eyes from flying debris, while hearing protection reduces the risk of hearing damage from the loud noise produced by the drill press. Depending on the materials being drilled, a dust mask or respirator can prevent inhalation of harmful particles. Always prioritize your safety by wearing the necessary protective gear.
Using Proper Clamping Techniques
Proper clamping techniques are vital for securely holding the workpiece during drilling operations. Use clamps or vices to firmly secure the workpiece to the drill press table. Ensure that the clamps are securely tightened and positioned to prevent any movement or shifting during drilling. This will help prevent accidents, ensure accurate drilling, and prolong the life of the drill press. Never attempt to hold the workpiece by hand while drilling, as this can lead to serious injuries.
Keeping the Work Area Clean
Maintaining a clean work area is crucial for safe and efficient drilling operations. Remove any unnecessary clutter or debris from the work area before starting your drilling tasks. This includes tools, materials, and any items that may obstruct your movement or interfere with the drill press operation. Regularly clean the work area after each use to prevent any hazards or accidents. A clean work area not only promotes safety but also allows you to focus on your work without distractions.
Avoiding Loose Clothing and Jewelry
When operating a drill press, it is important to avoid wearing loose clothing or jewelry that may get caught in the machine’s moving parts. Loose sleeves, ties, or dangling jewelry can easily become entangled and pose a serious risk of injury. It is recommended to wear fitted clothing and remove any jewelry, such as necklaces, bracelets, or rings, before operating the drill press. By eliminating these potential hazards, you can ensure a safer and more productive working environment.
Storing the Drill Press
Cleaning the Drill Press Before Storage
Before storing your drill press, it is crucial to clean and maintain it properly. This includes removing any leftover debris, dust, or coolant from the working surfaces, chuck, and other components. Use a soft brush or vacuum to remove dust and debris, and wipe down the surfaces with a clean cloth. Inspect the drill press for any signs of damage or wear and address any issues promptly to avoid further deterioration during storage. Cleaning your drill press before storage will help ensure its longevity and optimal performance.
Basic Storage Precautions
When storing your drill press, consider a few basic precautions to protect it from damage. Avoid storing the drill press in areas with high humidity or extreme temperature fluctuations, as these conditions can promote rust or damage electrical components. Ideally, store it in a clean and dry environment, away from direct sunlight. If possible, cover the drill press with a breathable cover to prevent dust accumulation without trapping moisture. Taking these storage precautions will help extend the lifespan of your drill press.
Covering the Drill Press
Covering your drill press when not in use is a simple yet effective way to protect it from dust, dirt, and other potential contaminants. Use a breathable cover made of canvas or a similar material to allow air circulation while preventing the entry of debris. Avoid using plastic or non-breathable covers, as they can trap moisture and potentially promote rust or damage. By covering your drill press, you can easily keep it clean and ready for use, ensuring its long-term functionality.
This image is property of www.woodworkersjournal.com.
Troubleshooting
Drill Bit Breakage
Drill bit breakage can occur due to various reasons, including excessive pressure, a dull drill bit, or a misaligned chuck. To prevent drill bit breakage, ensure that you are using the appropriate bit for the material and drilling operation. Apply consistent and moderate pressure while drilling, avoiding excessive force that may cause the bit to snap. Keep your drill bits sharp by regularly sharpening or replacing them as needed. If drill bit breakage continues to occur, inspect the chuck for misalignment or other issues and make any necessary adjustments or replacements.
Unusual Noises
If you notice unusual noises coming from your drill press during operation, it is important to address them promptly. Unusual noises can indicate various underlying issues, such as loose components, worn or damaged bearings, or misalignment. Start by checking and tightening all visible screws and bolts to ensure that everything is securely fastened. Inspect the bearings and other moving parts for signs of wear or damage. If the noises persist, consult the drill press manual or seek professional assistance to diagnose and resolve the issue.
Inaccurate Drilling
Drilling inaccuracies can be frustrating and may result from several factors. Check the alignment of the drill press components, including the table, spindle, and chuck, to ensure that they are properly aligned. Adjust as needed using the alignment techniques mentioned earlier in this article. Additionally, ensure that you are using appropriate drilling techniques and the correct drill bit for the intended material. A dull or worn drill bit can also cause inaccuracies, so regularly inspect and replace your drill bits as necessary.
Motor Overheating
If your drill press motor overheats during operation, it is important to address the issue promptly to avoid potential damage. Motor overheating can occur due to a variety of reasons, such as excessive workload, lack of proper lubrication, or electrical issues. Start by allowing the motor to cool down before inspecting it for any visible obstructions or debris. Ensure that the motor’s air vents and cooling system are clean and free from any blockages. Check the motor’s electrical connections to ensure they are secure and undamaged. If motor overheating persists, seek professional assistance to diagnose and resolve the issue.
Maintaining Electrical Components
Inspecting the Power Cord
Regularly inspecting the power cord of your drill press is important to ensure safe operation. Check the power cord for any signs of damage, such as fraying or exposed wires. If you notice any issues, it is essential to replace the power cord immediately to prevent electrical hazards. Avoid using the drill press with a damaged power cord and always prioritize safety when working with electrical components.
Checking the Switch
The switch is a critical electrical component of your drill press, responsible for turning the machine on and off. Regularly check the switch for any signs of damage or malfunction. Ensure that the switch operates smoothly and without any sticking or intermittent power interruptions. If any issues are detected, consult the manufacturer’s instructions for repairing or replacing the switch. Properly functioning switches are essential for safe and efficient operation of the drill press.
Cleaning the Electrical Connections
Over time, electrical connections in your drill press may accumulate dirt, dust, or oxidation, hindering their performance. Regularly inspect and clean the electrical connections to ensure optimal conductivity and prevent potential issues. First, disconnect the drill press from the power source. Use a clean cloth or brush to remove any debris or dust from the connections, taking care not to damage any wiring. If you notice any signs of oxidation or corrosion, you can use a contact cleaner or isopropyl alcohol to clean the connections. Allow the connections to dry completely before reconnecting the drill press to the power source.
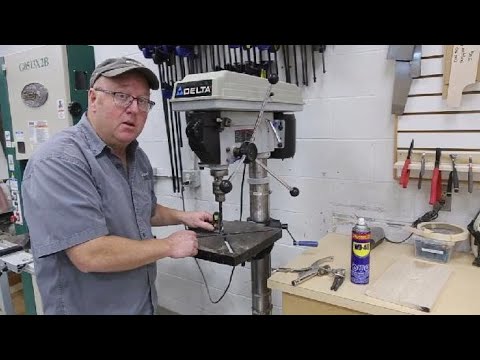
This image is property of i.ytimg.com.
Preventing Rust
Removing Rust
If you notice rust spots on your drill press, it is important to address them promptly to prevent further damage. Start by gently scrubbing the affected areas using a rust remover or a fine abrasive pad. Ensure that you remove all traces of rust and then wipe the surface clean with a dry cloth. Once the rust has been removed, apply a rust inhibitor or protective coating to prevent future rust formation. Regularly inspect your drill press for any signs of rust and address them promptly to maintain its appearance and functionality.
Applying Rust Prevention Methods
To prevent rust from forming on your drill press, it is essential to take preventive measures. Ensure that your drill press is stored in a clean and dry environment, away from moisture and humidity. Apply a thin layer of rust preventative, such as oil or a specialized rust inhibitor, to the exposed metal surfaces of your drill press. This protective coating will serve as a barrier against moisture and help prevent rust formation. Regularly inspect and reapply the rust preventative as needed to maintain the integrity of your drill press.
Professional Maintenance
Benefits of Professional Maintenance
While regular cleaning and maintenance can help keep your drill press in good working order, there are times when professional maintenance becomes necessary. Professional maintenance offers several benefits, including expert assessment and diagnosis of potential issues, thorough cleaning and lubrication of hard-to-reach areas, and specialized knowledge of your drill press model. Professional maintenance can also help identify any hidden problems before they escalate into major issues, ensuring the optimal performance and longevity of your drill press.
When to Consider Professional Help
There are specific situations when it is advisable to seek professional help for your drill press maintenance. If you encounter persistent issues, such as recurring inaccuracies or motor overheating, despite your own maintenance efforts, it may be an indicator of more significant problems. Additionally, if you are unsure about complex maintenance procedures or lack the necessary tools and expertise, professional assistance can provide a reliable solution. Furthermore, if your drill press is still under warranty, professional maintenance may be required to maintain the warranty coverage. Consider seeking professional help when necessary to ensure the best care for your drill press.
Choosing a Qualified Technician
When choosing a qualified technician for your drill press maintenance, it is essential to consider their expertise, experience, and reputation. Look for technicians who specialize in drill press maintenance and have a track record of working with your specific drill press model. Research online reviews and seek recommendations from trusted sources to find a technician known for their professionalism and quality of work. Additionally, ensure that the technician is certified and authorized by the manufacturer, as this can give you confidence in their knowledge and abilities. By choosing a qualified technician, you can entrust your drill press to capable hands and ensure that it receives the best maintenance and care.
In conclusion, regular cleaning, lubrication, inspection, adjustment, and adherence to safety measures are crucial for the proper maintenance of your drill press. By following the recommended maintenance practices outlined in this article, you can ensure the longevity, accuracy, and safety of your drill press. Remember to consult your drill press manual for specific instructions and recommendations from the manufacturer. Proper maintenance and care will not only extend the lifespan of your drill press, but also enhance your DIY experience and ensure the best results in your woodworking and metalworking projects.


