In this article, we will explore the fascinating world of drill press calibration and adjustment. Whether you’re a DIY enthusiast or just someone looking to improve their drilling precision, understanding how to properly calibrate and adjust your drill press is crucial. We’ll delve into the essential steps and techniques you need to know to achieve accurate and consistent drilling results. So grab your tool belt and let’s get started on this journey to mastering your drill press calibration and adjustment skills!
Understanding Drill Press Calibration
What is drill press calibration?
Drill press calibration refers to the process of adjusting and fine-tuning various components of a drill press to ensure its accuracy and optimal performance. It involves adjusting the depth stop collar, aligning the drill press table, checking the belt tension, ensuring chuck alignment, maintaining speed settings, calibrating quill travel, and implementing measures to safeguard accuracy. By calibrating a drill press, you can ensure precise drilling, minimize errors, and achieve consistent results in your woodworking or metalworking projects.
Why is drill press calibration important?
Drill press calibration is crucial for several reasons. First and foremost, it ensures accuracy in drilling. By calibrating the drill press, you can avoid inaccuracies such as drill bit wander or deviation, ensuring that the holes you drill are perfectly aligned and at the desired depth. Proper calibration also reduces the risk of excessive vibration during drilling, which can negatively impact the quality of your work and potentially cause damage to the drill press or workpiece. Additionally, calibration helps to extend the lifespan of your drill press by ensuring that all components are working together harmoniously and that no undue strain is placed on any part of the machine.
Common issues caused by improper calibration
Improper calibration of a drill press can result in various issues that hinder its performance and compromise the quality of your work. Some common problems caused by improper calibration include:
-
Drill bit wander or deviation: If the drill press is not properly calibrated, the drill bit may not stay centered or deviate from the intended drilling path. This can lead to misaligned holes and a lack of precision in your work.
-
Excessive vibration during drilling: Improper calibration can cause the drill press to vibrate excessively while in use. This vibration not only affects the quality of the holes drilled but also poses a safety risk and can lead to discomfort during operation.
-
Difficulty in adjusting depth or speed: If the depth stop collar or speed settings are not calibrated correctly, it can be challenging to make accurate adjustments. This can make it difficult to achieve consistent results or work with different materials effectively.
Calibrating a drill press addresses these issues and ensures that the machine performs optimally, giving you precise control over the drilling process.
Tools Required for Calibration
To calibrate a drill press, you will need several tools to perform various adjustments and measurements accurately. The tools required for calibration include:
Caliper
A caliper is used to measure the diameter of drill bits and other components accurately. It helps in determining the correct adjustments needed during calibration.
Depth gauge
A depth gauge is essential for measuring the depth of holes drilled. It allows you to set the desired drilling depth accurately and ensure consistency in your work.
Drill bit set
A set of drill bits is necessary for testing the accuracy of the drill press calibration. Different sizes of drill bits should be used to ensure that the depth and alignment adjustments are suitable for various applications.
Square
A square is used to check the alignment of the drill press table and ensure that it is perpendicular to the drill bit. It helps in achieving accurate drilling angles and prevents any deviations.
Adjustable wrench
An adjustable wrench is needed for adjusting various components of the drill press, such as the depth stop collar or the table tilt mechanism. It allows you to make precise adjustments and secure the components in place.
Having these tools ready will enable you to perform the necessary calibration steps effectively and ensure the accuracy and performance of your drill press.
Calibrating Drill Press Depth
Adjusting the depth stop collar
The depth stop collar is a crucial component that determines the drilling depth of the drill press. To calibrate the depth correctly, follow these steps:
- Loosen the set screw on the depth stop collar using an adjustable wrench.
- Slide the collar up or down the drill bit until the desired drilling depth is achieved.
- Tighten the set screw to secure the depth stop collar in place.
Measuring and verifying the depth
Once the depth stop collar is adjusted, it is essential to verify the accuracy of the drilling depth. Follow these steps to measure and verify the depth:
- Insert a drill bit into the chuck and tighten it securely.
- Place the depth gauge against the drill bit, ensuring it is perpendicular to the bit.
- Lower the drill bit until it touches the drill press table.
- Carefully measure and note the drilling depth indicated on the depth gauge.
- Repeat this process with different drill bit sizes to ensure consistent depth across various drilling applications.
Fine-tuning for precise drilling
If the drilling depth is not accurate according to the measurements obtained, slight adjustments may be necessary. Refer to the drill press user manual for specific instructions on fine-tuning the depth adjustment mechanism. By fine-tuning, you can achieve precise drilling depth and ensure that your projects are executed with accuracy.
Aligning the Drill Press Table
Checking table alignment
Proper alignment of the drill press table is crucial to ensure accurate drilling. To check the alignment, perform the following steps:
- Place a square against the drill press chuck, ensuring it is perpendicular to the drill bit.
- Position the edge of the square against the drill press table.
- Check if the square is flush against both the chuck and the table.
- If the square does not remain flush against both surfaces, the table may be misaligned.
Adjusting the table tilt
If the drill press table is misaligned, it may require adjustment to correct the tilt. Follow these steps to adjust the table tilt:
- Locate the table tilt mechanism, usually located beneath the table.
- Loosen the locking mechanism using an adjustable wrench.
- Tilt the table to the desired angle, ensuring it remains perpendicular to the drill bit when tightened.
- Tighten the locking mechanism to secure the table in place.
Securing the table to prevent movement
To prevent any unintended movement during drilling, it is crucial to secure the drill press table. This can be achieved by tightening the locking mechanisms of the table tilt and height adjustments. Ensuring a stable and fixed table position enhances the accuracy and safety of the drilling process.
Checking Drill Press Belt Tension
Understanding the importance of belt tension
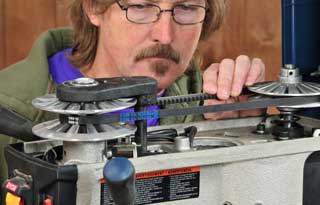
Proper belt tension is essential for the optimal performance of a drill press. The correct tension ensures that power is effectively transferred from the motor to the drill press spindle. Insufficient tension can result in slipping of the belt, affecting the speed and torque delivered by the drill press.
Inspecting the belt for wear
Before adjusting the belt tension, inspect the belt for any signs of wear or damage. Cracks, fraying, or noticeable stretching are signs that the belt may need replacement. It is important to use a high-quality, properly sized belt for your drill press to ensure optimal performance.
Adjusting the belt tension for optimal performance
To adjust the belt tension, follow these steps:
- Locate the belt tensioning mechanism, usually near the motor or the top of the drill press.
- Loosen the tensioning mechanism by turning the tensioning lever or adjusting the tensioning bolt.
- Gradually increase or decrease the tension until the belt has the proper tension.
- Test the tension by starting the drill press and observing the belt’s performance. It should not slip during operation.
- Once the correct tension is achieved, tighten the tensioning mechanism to secure the belt in place.
By properly adjusting the belt tension, you can optimize the power transfer and minimize the risk of belt slipping, ensuring consistent performance from your drill press.
Ensuring Drill Press Chuck Alignment
Checking the chuck runout
Chuck runout refers to the degree of wobble or eccentricity in the chuck and can affect the accuracy of drilling. To check the chuck runout, follow these steps:
- Insert a dial indicator into the drill press chuck.
- Position the indicator’s contact point against the drill bit.
- Slowly rotate the chuck by hand and observe any movement of the indicator’s needle.
- If there is excessive movement, the chuck may have runout.
Adjusting the chuck alignment
To adjust the chuck alignment, follow these steps:
- Open the chuck jaws fully and insert a rod or dowel into the chuck.
- Secure the rod or dowel in place.
- Slowly rotate the chuck, observing any runout.
- If runout is observed, gently tap the side of the chuck with a soft mallet to realign it.
- Repeat the runout checking process until minimal or no runout is observed.
Verifying chuck alignment with a dial indicator
To verify the chuck alignment after adjustment, follow these steps:
- Insert a dial indicator into the drill press chuck.
- Position the indicator’s contact point against the drill bit.
- Slowly rotate the chuck by hand and observe any movement of the indicator’s needle.
- If the runout is within an acceptable range, the chuck alignment has been successfully adjusted.
Verifying the chuck alignment with a dial indicator ensures that the adjustments made are accurate and that the chuck runs true, reducing the risk of drill bit wander or deviation.
Maintaining Drill Press Speed Settings
Understanding speed settings
Drill presses typically have multiple speed settings to accommodate various drilling applications and different materials. It is important to understand the speed settings and select the appropriate speed for the specific material and drill bit size.
Inspecting the speed belt and pulleys
Before adjusting the speed settings, inspect the speed belt and pulleys for any signs of wear or damage. Check for cracks, fraying, or other signs that may indicate the need for replacement. Additionally, ensure that the pulleys are clean and free from debris that could affect their performance.
Adjusting the speed settings for different materials
To adjust the speed settings for different materials, follow these steps:
- Consult the drill press user manual for the recommended speed ranges for various materials and drill bit sizes.
- Locate the speed pulley system, usually located near the motor or the top of the drill press.
- Adjust the position of the belt on the pulleys to change the speed.
- Refer to the speed chart in the user manual to select the appropriate speed for the material and drill bit size.
- Test the speed settings by drilling a test hole and observing the performance. Adjust as necessary.
By correctly adjusting the speed settings, you can optimize the drilling process for different materials, ensuring efficient cutting and minimizing the risk of damage to the drill bit or workpiece.
Calibrating Drill Press Quill Travel
Measuring the quill travel
Quill travel refers to the distance the quill, or spindle, moves vertically during drilling. To measure the quill travel, follow these steps:
- Use the depth gauge to measure the initial position of the quill. Set the depth gauge to zero at this position.
- Lower the quill until it reaches its maximum allowed depth.
- Measure and note the distance traveled by the quill, which indicates the quill travel.
Checking for any deviations
Once the quill travel is measured, it is essential to check for any deviations from the expected distance. If the measured distance deviates significantly from the specified quill travel in the user manual, it may indicate the need for adjustment or repair.
Adjusting the quill travel if necessary
If the measured quill travel deviates from the specified distance, consult the drill press user manual for guidance on adjusting the quill travel mechanism. Depending on the model of the drill press, there may be specific steps or instructions to follow to make the necessary adjustments. By ensuring accurate quill travel, you can achieve consistent drilling depth and improve the overall performance of your drill press.
Safeguarding Drill Press Accuracy
Using a drill press vise for stability
A drill press vise is a useful accessory that provides stability and prevents workpieces from moving during drilling. By securely clamping the workpiece in the drill press vise, you minimize the risk of errors caused by movement or shifting, ensuring accurate drilling.
Using a center punch to mark drilling points
A center punch is a tool used to create a small indentation or mark on a workpiece to guide the drill bit during drilling. By using a center punch to mark the drilling points, you can enhance accuracy and prevent the drill bit from wandering or deviating from the desired location.
Regularly cleaning and lubricating the drill press
Regular maintenance, such as cleaning and lubricating the drill press, ensures smooth operation and extends the lifespan of the machine. Remove any debris, dust, or buildup from the drill press components, including the table, chuck, and depth stop collar. Apply a suitable lubricant to the moving parts, such as the quill, to reduce friction and ensure optimum performance.
By implementing these measures, you can safeguard the accuracy of your drill press, maintain its performance, and prolong its lifespan.
Troubleshooting Common Calibration Problems
Drill bit wander or deviation
If you encounter drill bit wander or deviation despite proper calibration, there are a few potential causes to consider. First, check the chuck alignment and adjust it if necessary. A misaligned chuck can lead to drill bit wander. Additionally, ensure that the workpiece is securely clamped in place using a drill press vise to prevent movement during drilling. Finally, examine the drill bit itself for damage or wear. A worn or damaged drill bit may not cut accurately and can contribute to wander or deviation.
Excessive vibration during drilling
Excessive vibration during drilling can be a result of various factors. First, check that the drill press is securely bolted to a stable surface or workbench. Any looseness or instability can cause vibration. Additionally, inspect the drill press table alignment and make necessary adjustments to ensure it is perpendicular to the drill bit. Finally, check the belt tension and adjust as needed to prevent slipping, which can contribute to vibration.
Difficulty in adjusting depth or speed
If you are experiencing difficulty in adjusting the depth or speed settings, there are a few potential solutions. First, check that the locking mechanisms for these adjustments are not overly tightened, as this can impede their movement. Loosen the locking mechanisms slightly to allow for adjustments. Additionally, ensure that the components involved in these adjustments, such as the depth stop collar or the speed pulley system, are clean and free from debris that may hinder their movement.
By troubleshooting these common calibration problems, you can address any issues that may arise with your drill press and ensure that it operates accurately and effectively.
Calibrating your drill press is an essential part of maintaining its performance and achieving accurate drilling results. By following the steps outlined in this comprehensive guide, utilizing the necessary tools, and implementing troubleshooting techniques, you can ensure that your drill press is calibrated to perfection. Whether you are a DIY enthusiast or a professional woodworker or metalworker, proper calibration will enhance your precision and efficiency in all drilling tasks. Keep your drill press calibrated, and enjoy the satisfaction of consistently high-quality results in your projects.