If you’ve ever wondered what else a drill press can do besides drilling holes, you’ve come to the right place! In this blog, we’ll explore the wide range of tasks that a drill press can tackle, making it a versatile tool for any DIY enthusiast. From precise sanding and mortising to creating intricate designs on wood, a drill press has the potential to elevate your woodworking projects to new heights. So, let’s roll up our sleeves and dive into the exciting world of drill press possibilities!
Woodworking
Woodworking is a versatile and rewarding craft that allows you to create beautiful and functional pieces from wood. Whether you’re a seasoned woodworker or just starting out, it’s essential to understand the different techniques and tools used in this field. In this article, we will explore various aspects of woodworking, from creating dowel joints to routing shapes and patterns. So, let’s dive in and discover the wonders of woodworking!
Creating Dowel Joints
Dowel joints are a strong and reliable method of joining two pieces of wood together. They are widely used in furniture making and carpentry projects. To create a dowel joint, you will need a drill press with a dowel drilling jig, dowel pins, and some wood glue.
First, mark the location where you want the dowels to be inserted on both pieces of wood. Then, using a dowel drilling jig, secure the wood to the drill press table. Set the drill press to the desired depth and drill the holes carefully, ensuring they are perfectly aligned. Apply some wood glue to the dowels and insert them into the drilled holes. Finally, join the two pieces of wood together, ensuring a tight fit. Clamp the pieces in place until the glue dries completely, and you’ll have a sturdy and durable dowel joint.
Making Mortises and Tenons
Mortise and tenon joints are another popular method of joining wood together. This joint consists of a protruding tenon on one piece of wood that fits into a corresponding mortise on the other piece. It provides excellent stability and strength to the overall structure. A drill press can be incredibly helpful in creating accurate mortises and tenons.
To make a mortise, you will need a mortising attachment for your drill press. Attach the mortising chisel to the drill press and adjust the depth and width according to your desired specifications. Carefully position the wood piece and secure it to the drill press table. With a steady hand, plunge the drill press down to create the mortise. Repeat this process for all required mortises.
For creating tenons, you can use a table saw or a router. Cut the tenon on the end of one piece of wood to fit the mortise and ensure a snug fit. Assemble the joint by inserting the tenon into the mortise carefully. Apply some wood glue for added strength, and clamp the pieces until the glue sets. Now you have a solid mortise and tenon joint!
Boring Holes for Hardware Installation
When working on woodworking projects, you often need to install hardware such as hinges, handles, or knobs. A drill press can be an excellent tool for boring precise holes for hardware installation, ensuring a perfect fit and alignment.
To bore holes for hardware installation, start by marking the location of the holes on the wood. Secure the wood piece to the drill press table using clamps or a dedicated drilling jig. Choose the appropriate drill bit size and install it in the drill press. Adjust the depth and speed according to the hardware requirements and the type of wood you’re working with. Carefully position the drill bit over the marked location and lower the drill press to bore the hole. Repeat this process for all required holes, and you’ll have perfectly aligned and clean-cut holes for hardware installation.
Routing Shapes and Patterns
Routing is the process of hollowing out or cutting grooves in wood using a router. It allows you to create intricate shapes, patterns, or decorative edges on your woodworking projects. A drill press can act as a versatile tool for routing when used with a router attachment.
To route shapes and patterns using a drill press, you will need a router attachment that fits onto the drill press spindle. Install the router attachment, ensuring it is secure and aligned correctly. Adjust the speed and depth according to your requirements and the type of wood you’re working with. Mark the desired shape or pattern on the wood and guide it along the router attachment, moving the wood against the rotation of the router bit. Take your time and work slowly, allowing the router bit to create the desired shape or pattern. With precise movements and proper guidance, you can achieve stunning results when routing with a drill press.
Metalworking
While commonly associated with woodworking, a drill press also has a wide range of applications in the field of metalworking. Metalworking involves working with various types of metals, and a drill press can assist in tasks such as drilling precise holes, tapping threads, reaming holes, and countersinking screws. Let’s explore these metalworking techniques further!
Drilling Precise Holes in Metal
When working with metal, drilling precise holes is crucial for achieving accurate and professional results. A drill press equipped with the right drill bits can make this task much easier and more efficient.
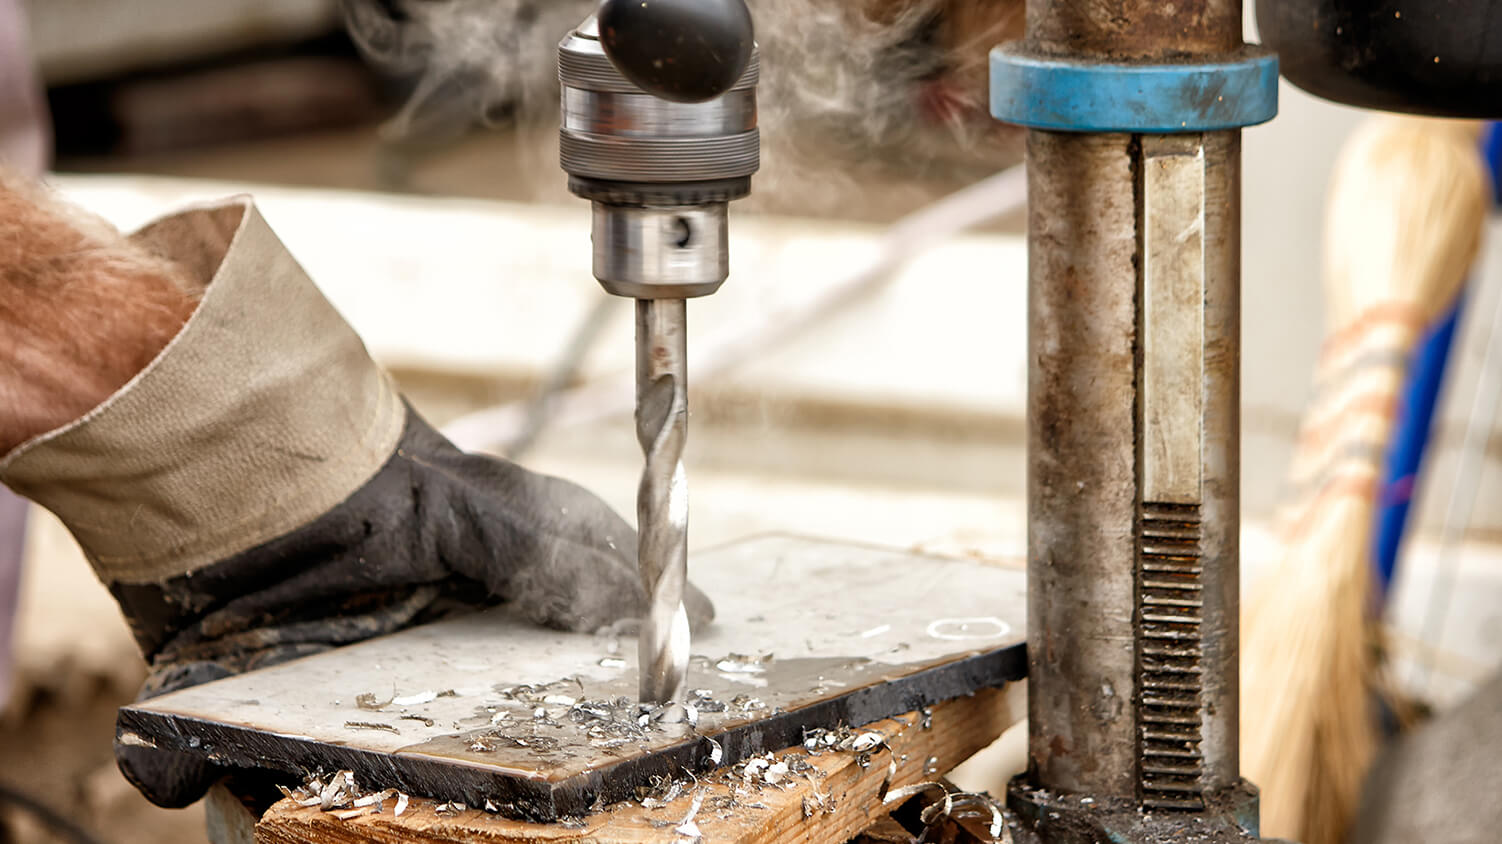
To drill precise holes in metal, start by marking the location of the hole on the metal surface. Clamp the metal securely to the drill press table, ensuring it doesn’t move during drilling. Select the appropriate drill bit for the metal type and hole size you need. Attach the drill bit to the drill press and adjust the speed and depth according to the metal’s properties. With a steady hand, lower the drill press to the marked location and begin drilling. Apply gentle and consistent pressure, allowing the drill bit to cut through the metal gradually. Use cutting fluid to lubricate the drill bit and reduce heat buildup. Once the hole is drilled, remove any metal shavings and repeat the process for additional holes. With a drill press, you can achieve precise and clean holes in metal with ease.
Tapping Threads
Tapping threads is the process of creating internal threads in metal surfaces. It allows you to insert screws or bolts and create secure connections. A drill press, along with a tapping attachment, can simplify this threading process.
To tap threads using a drill press, start by securing the metal piece to the drill press table. Attach the tapping attachment onto the drill press spindle, ensuring it is aligned correctly. Select the appropriate tap size for the desired thread size and material. Apply cutting fluid to the tap to lubricate the cutting process. Lower the drill press to the marked location on the metal. Use the drill press to turn the tap into the metal, applying steady and even pressure. As you turn the tap, it will cut the threads into the metal. Continue turning until the tap reaches the desired depth. Reverse the drill press to remove the tap from the metal. Clean the threads and test the fit with the corresponding screw or bolt. With the help of a drill press and tapping attachment, you can create precise and reliable internal threads in metal surfaces.
Reaming Holes
Sometimes, you may need to enlarge or refine existing holes in metal surfaces. Reaming is the process of enlarging or smoothing holes to achieve the desired size or surface finish. A drill press can assist in reaming operations, ensuring precise and consistent hole enlargement.
To ream holes using a drill press, securely clamp the metal piece to the drill press table. Attach a reamer to the drill press, ensuring it is secured and aligned correctly. Select the appropriate reamer size for the desired hole enlargement. Adjust the speed and depth according to the metal and reamer specifications. Lower the drill press to the hole you want to ream. Apply gentle pressure and feed the reamer into the hole, allowing it to remove material and enlarge the hole gradually. Use cutting fluid to lubricate the reaming process and increase its efficiency. Continue the reaming process until you achieve the desired hole size and surface finish. With the help of a drill press, you can easily and precisely ream holes in metal surfaces.
Countersinking Screws
In certain metalworking applications, you may need to recess screws or bolts into the metal surface to achieve a flush and clean finish. Countersinking is the process of creating a conical recess to accommodate the screw or bolt head. A drill press equipped with a countersinking attachment can simplify this process and ensure accurate results.
To countersink screws using a drill press, secure the metal piece to the drill press table. Attach the countersinking attachment to the drill press spindle, ensuring it is aligned correctly. Select the appropriate countersink size and adjust the speed and depth according to the metal and screw specifications. Lower the drill press to the marked location on the metal. Using gentle pressure, lower the countersink attachment into the metal, creating a conical recess to fit the screw head. Lift the drill press and test the fit with the screw head. Make any necessary adjustments to achieve the desired depth and angle. With the help of a drill press and countersinking attachment, you can easily and precisely countersink screws in metal surfaces, enhancing the overall appearance and functionality of your metalworking projects.
Sanding and Finishing
Sanding and finishing are essential steps in woodworking that can greatly enhance the appearance and feel of your projects. Whether you’re working on curved or irregular surfaces, polishing metal, or buffing and waxing surfaces, a drill press can be a valuable tool in achieving smooth and professional finishes. Let’s explore these sanding and finishing techniques further!
Sanding Curved or Irregular Surfaces
Sanding curved or irregular surfaces can be challenging, as it requires precision and control. A drill press, when equipped with the right sanding attachments, can make this task much easier and efficient.
To sand curved or irregular surfaces using a drill press, you will need sanding drums or sleeves specifically designed for this purpose. These attachments fit onto the drill press spindle and provide a rotating sanding surface. Secure the wood piece to the drill press table or use a dedicated sanding jig for improved stability. Choose the appropriate sanding drum or sleeve size for the desired curve or surface irregularity. Attach the sanding attachment to the drill press spindle, ensuring it is secure and aligned correctly. Adjust the speed and depth according to the wood type and desired finish. With the drill press turned on, carefully guide the wood piece against the rotating sanding attachment, moving it back and forth to achieve an even sanding. Maintain a steady hand and apply gentle pressure to avoid excessive material removal. Keep in mind that sanding gradually and frequently checking your progress will yield the best results. With a drill press, you can achieve smooth and consistent sanding on curved or irregular surfaces, allowing you to create stunning woodworking projects.
Polishing Metal and Other Materials
Polishing metal surfaces can give them a glossy and reflective finish, enhancing their aesthetic appeal. A drill press can assist in the polishing process when used with appropriate polishing attachments and compounds.
To polish metal and other materials using a drill press, you will need polishing wheels or buffs made of various materials such as cotton, felt, or leather. These attachments fit onto the drill press spindle and provide a rotating polishing surface. Secure the metal piece to the drill press table, ensuring it does not move during the polishing process. Choose the appropriate polishing wheel or buff for the desired finish and metal type. Attach the polishing attachment to the drill press spindle, ensuring it is secure and aligned correctly. Apply the appropriate polishing compound to the rotating wheel or buff, evenly distributing it across the surface. Turn on the drill press and lower the metal piece onto the rotating polishing attachment. Move the metal piece back and forth against the polishing surface, allowing the compound to remove any imperfections and create a smooth and reflective finish. Apply consistent pressure and maintain a steady hand throughout the polishing process. Clean the metal surface after polishing to remove any residual compound. With the help of a drill press and the right polishing attachments, you can achieve professional-quality metal polishing results.
Buffing and Waxing Surfaces
Buffing and waxing are essential steps in finishing woodworking projects, as they enhance the overall appearance and provide a protective layer. A drill press can be an excellent tool for buffing and waxing surfaces when used with appropriate buffing attachments and waxes.
To buff and wax surfaces using a drill press, you will need buffing pads or wheels made of materials such as cotton or wool. These attachments fit onto the drill press spindle and provide a rotating buffing surface. Secure the wood piece to the drill press table, ensuring it remains stable during the buffing and waxing process. Choose the appropriate buffing pad or wheel for the desired finish and material compatibility. Attach the buffing attachment to the drill press spindle, ensuring it is secure and aligned correctly. Apply the appropriate wax or compound to the rotating buffing surface, evenly distributing it across the surface. Turn on the drill press and lower the wood piece onto the rotating buffing attachment. Move the wood piece back and forth against the buffing pad or wheel, allowing the wax or compound to fill any imperfections and create a smooth and lustrous finish. Apply consistent pressure and maintain a steady hand throughout the buffing and waxing process. Clean the wood surface after buffing to remove any residual wax or compound. With the help of a drill press and the right buffing attachments and waxes, you can achieve beautiful and protected finishes on your woodworking projects.
Routing and Shaping
Routing and shaping wood allows you to create unique and decorative elements in your woodworking projects. Whether you’re creating decorative edges, making grooves and dadoes, cutting slots for biscuits or dowels, or forming curved profiles, a drill press with the right router attachments can be a valuable asset. Let’s explore these routing and shaping techniques further!
Creating Decorative Edges
Decorative edges can add elegance and character to your woodworking projects. A drill press, when used with the right router bits, can be an excellent tool for creating intricate and decorative edges on wood pieces.
To create decorative edges using a drill press, you will need router bits specifically designed for this purpose. These bits fit onto the drill press spindle and provide a rotating cutting surface. Secure the wood piece to the drill press table, ensuring it remains stable throughout the cutting process. Choose the appropriate router bit for the desired edge design and wood type. Attach the router bit to the drill press spindle, ensuring it is secure and aligned correctly. Adjust the speed and depth according to your design requirements and the wood’s properties. Carefully guide the wood piece against the rotating router bit, moving it along the edges to create the desired decorative profile. Maintain a steady hand and move at a consistent pace to achieve precise and clean cuts. Some router bits may require multiple passes to achieve the desired depth and shape. With the help of a drill press and the right router attachments, you can effortlessly create decorative edges that will set your woodworking projects apart.
Making Grooves and Dadoes
Grooves and dadoes are commonly used to house shelves, panels, or decorative elements in woodworking projects. A drill press, when equipped with the appropriate router attachments and bits, can facilitate the creation of precise and clean grooves and dadoes.
To make grooves and dadoes using a drill press, secure the wood piece to the drill press table, ensuring it remains stable throughout the cutting process. Choose the appropriate router attachment and bit for the desired groove or dado size and wood type. Attach the router bit to the drill press spindle, ensuring it is secure and aligned correctly. Adjust the speed and depth according to your specifications. Position the wood piece at the desired location for the groove or dado. Carefully guide the wood piece against the rotating router bit, moving it along the desired path. Apply consistent pressure and maintain a steady hand to achieve accurate and clean cuts. Make multiple passes to reach the desired depth. With the help of a drill press and the right router attachments and bits, you can easily create grooves and dadoes that will enhance the functionality and design of your woodworking projects.
Cutting Slots for Biscuits or Dowels
Slots for biscuits or dowels are often used to join wood pieces together, providing added strength and stability. A drill press, when equipped with appropriate router attachments or specialty bits, can aid in cutting precise slots for biscuits or dowels.
To cut slots for biscuits or dowels using a drill press, secure the wood piece to the drill press table, ensuring it remains stable throughout the cutting process. Determine the depth and width of the slot, as well as the spacing for multiple slots if necessary. Choose the appropriate router attachment or specialty bit for cutting biscuit or dowel slots. Attach the router attachment or specialty bit to the drill press spindle, ensuring it is secure and aligned correctly. Adjust the speed and depth according to your specifications. Position the wood piece at the desired location for the slot. Carefully guide the wood piece against the rotating router attachment or specialty bit, moving it along the desired path. Apply consistent pressure and maintain a steady hand to achieve accurate and clean cuts. Make multiple passes to reach the desired depth. Clean the slots after cutting to remove any debris or wood particles. With the help of a drill press and the right router attachments or specialty bits, you can easily create slots for biscuits or dowels, allowing for strong and reliable wood joinery.
Forming Curved Profiles
Curved profiles add visual interest and uniqueness to woodworking projects. A drill press, when used with appropriate router attachments or specialty bits, can assist in forming curved profiles with precision and ease.
To form curved profiles using a drill press, secure the wood piece to the drill press table, ensuring it remains stable throughout the shaping process. Determine the desired curve and the appropriate router attachments or specialty bits for creating that specific profile. Attach the router attachments or specialty bits to the drill press spindle, ensuring they are secure and aligned correctly. Adjust the speed and depth according to your specifications. Position the wood piece at the starting point for the curved profile. Carefully guide the wood piece against the rotating router attachments or specialty bits, following the desired curve. Apply consistent pressure and maintain a steady hand to achieve smooth and accurate shaping. Make multiple passes to refine the curvature and achieve the desired profile. With the help of a drill press and the right router attachments or specialty bits, you can effortlessly create beautiful curved profiles that will elevate the appearance and design of your woodworking projects.
Cutting
Cutting is a fundamental aspect of woodworking, and a drill press can be an excellent tool for various cutting tasks. Whether you’re oscillating drum sanding, using hole saws or fly cutters, cutting circles or curves with a circle cutter, or trimming with a cutting guide, a drill press can provide stability and accuracy. Let’s delve into these cutting techniques further!
Oscillating Drum Sanding
Oscillating drum sanding involves removing material and shaping wood surfaces using a rotating drum sander. A drill press, when equipped with an oscillating drum sander attachment, can assist in achieving a smooth finish and precise shaping.
To perform oscillating drum sanding using a drill press, secure the wood piece to the drill press table or use a dedicated sanding jig for added stability. Attach the oscillating drum sander to the drill press spindle, ensuring it is secure and aligned correctly. Adjust the speed and depth according to the desired material removal and finish quality. Turn on the drill press and lower the oscillating drum sander onto the wood surface. Move the wood piece back and forth under the rotating drum sander, allowing it to remove material and shape the wood surface evenly. Apply consistent pressure and maintain a steady hand throughout the sanding process. It’s important to avoid excessive pressure or aggressive movements that could result in uneven sanding or damage to the wood. With the help of a drill press and an oscillating drum sander attachment, you can achieve professional-quality sanding and shaping results.
Using Hole Saws or Fly Cutters
Hole saws and fly cutters are cutting tools used to create large or precise holes in wood surfaces. A drill press, when equipped with the right drill bits and accessories, can facilitate the use of these cutting tools and ensure accurate hole cutting.
To use hole saws or fly cutters with a drill press, secure the wood piece to the drill press table, ensuring it remains stable throughout the cutting process. Choose the appropriate hole saw or fly cutter size for the desired hole dimensions and material compatibility. Attach the hole saw or fly cutter to the drill press spindle, ensuring it is secure and aligned correctly. Adjust the speed and depth according to the wood and cutting tool specifications. Lower the drill press to the marked location on the wood and begin cutting. Apply gentle and consistent pressure to allow the hole saw or fly cutter to remove material and create the hole. Take care to keep the cutting tool aligned and steady, allowing it to do the work without excessive force. Remove the wood chips or debris during the cutting process, ensuring smooth and continuous cutting. Once the hole is cut, clean the surface and remove any remaining wood particles. With the help of a drill press, you can easily and accurately cut large or precise holes in wood surfaces.
Cutting Circles or Curves with a Circle Cutter
Cutting circles or curves in woodworking projects requires precision and control. A drill press, when equipped with a circle cutter attachment, can greatly facilitate the cutting of circles or curves with accuracy.
To cut circles or curves using a drill press and a circle cutter attachment, secure the wood piece to the drill press table, ensuring it remains stable throughout the cutting process. Attach the circle cutter to the drill press spindle, ensuring it is secure and aligned correctly. Adjust the diameter and depth according to the desired circle or curve size and cutting requirements. Position the center of the desired circle or curve on the wood surface. Lower the drill press and align the cutting blade with the marked center point. Start the drill press and rotate the circle cutter around the center point, allowing the cutting blade to remove material and create the desired shape. Keep a steady hand and apply consistent pressure throughout the cutting process for accurate and clean results. Stop the drill press and lift the circle cutter once the desired shape is achieved. Sand or smooth the cut edges as needed to achieve a finished look. With the help of a drill press and a circle cutter attachment, you can easily and precisely cut circles or curves to enhance the design and functionality of your woodworking projects.
Trimming with a Cutting Guide
Trimming woodworking pieces to achieve precise dimensions or clean edges is often required. A drill press, when equipped with a cutting guide attachment, can assist in achieving accurate and straight trims in your woodworking projects.
To trim with a cutting guide using a drill press, secure the wood piece to the drill press table, ensuring it remains stable throughout the trimming process. Attach the cutting guide to the drill press, ensuring it is secure and aligned correctly. Adjust the cutting guide according to the desired trim length and angle. Position the wood piece against the cutting guide and secure it in place. Lower the drill press and align the cutting tool or blade with the cutting guide. Start the drill press and move the wood piece along the cutting guide, allowing the cutting tool or blade to trim the wood accurately and cleanly. Apply consistent pressure and maintain a steady hand for precise cutting. Ensure that the wood piece remains in contact with the cutting guide throughout the trimming process to achieve straight and clean trims. With the help of a drill press and a cutting guide attachment, you can easily achieve accurate and professional trims in your woodworking projects.
Assembly and Clamping
Proper assembly and effective clamping are essential for ensuring the structural integrity and stability of your woodworking projects. A drill press can serve as a valuable tool in various assembly and clamping techniques. Let’s explore some of these techniques further!
Using the Drill Press as a Clamping Tool
A drill press, with its stable and robust structure, can be utilized as a makeshift clamping tool in certain woodworking scenarios. This technique is particularly useful when you need to secure small parts or delicate assemblies during gluing or other assembly tasks.
To use the drill press as a clamping tool, assess the size and nature of the parts or assemblies that need to be secured. Ensure that the drill press table is clean and free of dust or debris that could affect the clamping process. Position the parts or assemblies on the drill press table, ensuring that they are aligned and ready for clamping. Carefully lower the drill press to apply pressure on the parts or assemblies, ensuring a firm and secure hold. The weight and stability of the drill press will help maintain the necessary pressure during the gluing or assembly process. However, it’s important to exercise caution and be aware of any potential damage to the drill press or the wood surfaces. Once the glue has dried or the assembly is complete, carefully lift the drill press to release the pressure and remove the clamped parts. This technique can provide additional stability and precision during the assembly process, ensuring successful woodworking projects.
Aligning and Drilling Holes for Dowels
Dowels are often used in woodworking projects to provide extra strength and stability. Proper alignment and accurate drilling of holes for dowels are crucial to ensure a secure and durable joint. A drill press can assist in aligning and drilling holes for dowels with precision and ease.
To align and drill holes for dowels using a drill press, carefully position the wood pieces that need to be joined. Use clamps or other alignment tools to ensure proper alignment and prevent any movement during drilling. Mark the desired locations for the dowel holes on both wood pieces. Using a doweling jig or a dedicated drilling guide, secure the wood pieces together, ensuring they don’t shift. Attach the appropriate drill bit to the drill press, ensuring it is aligned with the marking on each wood piece. Adjust the speed and depth according to the dowel size and wood type. Lower the drill press and drill the dowel holes, being careful to maintain a straight and perpendicular drilling motion. Repeat the process for all required dowel holes. Once the dowel holes are drilled, remove any excess dust or debris. Apply wood glue to the dowels and insert them into the corresponding holes, ensuring a tight fit. Assemble the wood pieces together, aligning the dowels and holes. Apply clamps or other pressure-applying tools to secure the joint until the glue dries completely. With the help of a drill press, you can achieve precise alignment and accurate drilling of dowel holes, resulting in strong and reliable wood joints.
Securing Pieces While Glue Dries
Gluing is a common method of joining wood pieces together, providing strength and stability. However, during the drying process, it’s crucial to ensure that the glued pieces remain in the desired position until the glue sets. A drill press can be an excellent tool for securing pieces and maintaining alignment while the glue dries.
To secure pieces while the glue dries using a drill press, assess the size and nature of the glued pieces. Ensure that the drill press table is clean and free of any obstacles that could affect the clamping process. Apply wood glue to the surfaces that need to be joined. Position the glued pieces in the desired alignment, using alignment tools or markings to ensure accuracy. Carefully lower the drill press to apply pressure on the glued pieces, ensuring they remain in position until the glue sets. The weight and stability of the drill press will aid in maintaining the necessary pressure and alignment during the drying process. However, it’s important to exercise caution and be aware of any potential damage to the drill press or the wood surfaces. Depending on the type of glue being used, follow the manufacturer’s instructions regarding curing time. Once the glue has fully dried, carefully lift the drill press to release the pressure and remove the secured pieces. The use of a drill press as a clamping tool during the gluing process can provide additional stability, ensuring successful and durable wood joints.
Honing and Sharpening
Maintaining the sharpness and precision of your tools is crucial for achieving outstanding woodworking results. Honing and sharpening chisels, plane blades, drill bits, and other cutting tools can be easily accomplished using a drill press. Let’s explore some honing and sharpening techniques that can be performed with a drill press!
Honing and Sharpening Chisels and Plane Blades
Honing and sharpening chisels and plane blades are essential for achieving clean and precise cuts in woodworking projects. A drill press, when equipped with appropriate sharpening attachments or specialty honing tools, can be a valuable asset in maintaining sharp and efficient cutting edges.
To hone and sharpen chisels and plane blades using a drill press, secure the sharpening stone or honing guide to the drill press table or a dedicated sharpening jig. Attach the appropriate sharpening attachment or honing tool to the drill press spindle, ensuring it is secure and aligned correctly. Adjust the speed and depth according to the sharpening or honing requirements and the cutting tool material. Place the chisel or plane blade into the honing guide or against the sharpening stone, ensuring the beveled edge aligns with the sharpening surface. Carefully lower the drill press to initiate the sharpening or honing process. Maintain a steady hand and ensure even contact between the cutting tool and the sharpening surface. Gradually move the tool back and forth to achieve an even and sharp edge. Clean the tool frequently during the sharpening or honing process to remove any metal particles or debris. Repeat the process until the desired level of sharpness is achieved. With the help of a drill press and appropriate sharpening attachments or honing tools, you can easily maintain the sharpness and precision of your chisels and plane blades, ensuring optimal cutting performance.
Refurbishing Drill Bits and Hole Saw Blades
Over time, drill bits and hole saw blades can become dull or worn, resulting in inefficient cutting and poor hole quality. A drill press with appropriate grinding attachments or specialty refurbishing tools can assist in restoring drill bits and hole saw blades to their optimal condition.
To refurbish drill bits and hole saw blades using a drill press, secure the refurbishing stone or grinding attachment to the drill press table or a dedicated refurbishing jig. Attach the appropriate grinding attachment or refurbishing tool to the drill press spindle, ensuring it is secure and aligned correctly. Adjust the speed and depth according to the refurbishing requirements and the cutting tool material. Carefully position the drill bit or hole saw blade against the refurbishing stone or grinding attachment, ensuring even contact between the cutting edge and the refurbishing surface. Lower the drill press to initiate the refurbishing or grinding process. Move the drill bit or hole saw blade back and forth along the refurbishing surface to remove any dull or worn areas and restore a sharp cutting edge. Take care to maintain an even pressure and consistent movement throughout the refurbishing process. Clean the tool frequently during the refurbishing process to remove any metal particles or debris. Periodically test the drill bit or hole saw blade’s sharpness and cutting performance. Repeat the process until the desired level of refurbishing is achieved. With the help of a drill press and appropriate grinding attachments or refurbishing tools, you can easily extend the lifespan and performance of your drill bits and hole saw blades.
Creating Custom Sharpening Jigs
Creating custom sharpening jigs for your woodworking tools can greatly enhance the efficiency and consistency of your sharpening processes. A drill press, when equipped with appropriate drilling and cutting attachments, can simplify the creation of custom sharpening jigs.
To create custom sharpening jigs using a drill press, determine the dimensions and specifications of the desired jig. Secure the material for the jig to the drill press table, ensuring it remains stable throughout the cutting and drilling process. Attach the appropriate cutting or drilling attachment to the drill press spindle, ensuring it is secure and aligned correctly. Adjust the speed and depth according to the material and jig requirements. Position the material in line with the cutting or drilling attachment and lower the drill press to initiate the cutting or drilling process. Move the material along the attachment or guide it against a stationary attachment to achieve the desired shape or hole. Take care to maintain a steady hand and apply consistent pressure throughout the cutting or drilling process. Clean the material and deburr any rough edges or holes after cutting or drilling. With the help of a drill press and appropriate cutting or drilling attachments, you can easily create custom sharpening jigs that will streamline your sharpening processes and enhance the performance of your woodworking tools.
Drum Sanding
Drum sanding is a versatile technique that allows you to smooth and shape curved or contoured wood surfaces. A drill press, when equipped with a drum sanding attachment, can make this process more accessible and efficient.
Smoothing and Shaping Curved or Contoured Surfaces
Smoothing and shaping curved or contoured wood surfaces require precision and control. A drill press, when used with an appropriate drum sanding attachment, can facilitate this process and provide consistent results.
To smooth and shape curved or contoured surfaces using a drill press and a drum sanding attachment, securely clamp the wood piece to the drill press table or use a dedicated sanding jig for increased stability. Attach the drum sanding attachment to the drill press spindle, ensuring it is secure and aligned correctly. Adjust the speed and depth according to the desired material removal and finish quality. Turn on the drill press and lower the drum sanding attachment onto the wood surface. Carefully move the wood piece against the rotating drum sanding attachment, allowing it to remove material and shape the curved or contoured surface evenly. Maintain a steady hand and apply gentle pressure to avoid excessive material removal or damage to the wood. Monitor your progress frequently, making adjustments as needed. Keep in mind that sanding gradually and checking your progress frequently will yield the best results. With a drill press and a drum sanding attachment, you can achieve smooth and consistent sanding and shaping on curved or contoured wood surfaces, elevating the quality of your woodworking projects.
Patterning
Patterning is an essential aspect of woodworking that allows you to create repetitive designs or transfer patterns onto workpieces. A drill press can play a crucial role in pattern creation and transfer, enhancing the precision and efficiency of your woodworking projects.
Creating Templates and Patterns for Repetitive Designs
Creating templates and patterns is a useful technique to replicate designs or shapes in woodworking projects. A drill press, when used with appropriate cutting or shaping tools, can help in creating templates and patterns for repetitive designs.
To create templates and patterns for repetitive designs using a drill press, secure the material for the template or pattern to the drill press table, ensuring it remains stable throughout the cutting or shaping process. Choose the appropriate cutting or shaping tool for the desired design or shape. Attach the cutting or shaping tool to the drill press spindle, ensuring it is secure and aligned correctly. Adjust the speed and depth according to the material and cutting or shaping requirements. Position the material in line with the cutting or shaping tool and lower the drill press to initiate the cutting or shaping process. Move the material along the cutting or shaping tool or guide it against a stationary tool to achieve the desired template or pattern. Take care to maintain a steady hand and apply consistent pressure throughout the cutting or shaping process. Clean the material and deburr any rough edges or shapes after cutting or shaping. With the help of a drill press and appropriate cutting or shaping tools, you can easily create templates and patterns for repetitive designs, streamlining and enhancing the precision of your woodworking projects.
Transferring Patterns onto Workpieces
Transferring patterns onto workpieces is essential for accurately replicating designs or shapes. A drill press, when equipped with appropriate transfer tools or accessories, can simplify the pattern transfer process and ensure precision.
To transfer patterns onto workpieces using a drill press, secure the pattern material or template to the drill press table or a dedicated transfer jig. Choose the appropriate transfer tool or accessory for the desired pattern transfer method. Attach the transfer tool or accessory to the drill press spindle, ensuring it is secure and aligned correctly. Adjust the speed and depth according to the material and transfer requirements. Position the workpiece in line with the transfer tool or accessory and lower the drill press to initiate the pattern transfer process. Move the workpiece against the transfer tool or accessory or guide it against a stationary tool to achieve an accurate pattern transfer. Take care to maintain a steady hand and apply consistent pressure throughout the transfer process. Clean the workpiece after the transfer to remove any residual pattern material or debris. With the help of a drill press and appropriate transfer tools or accessories, you can easily and accurately transfer patterns onto workpieces, ensuring precise and consistent designs in your woodworking projects.
Miscellaneous
In addition to the various techniques and applications mentioned above, a drill press can be utilized in various other woodworking tasks. Let’s explore some of these miscellaneous applications!
Creating Marquetry or Inlay Work
Marquetry or inlay work involves the intricate cutting and fitting of small pieces of wood, metal, or other materials into a larger workpiece to create decorative designs or patterns. A drill press, with its stability and precision, can greatly assist in the creation and assembly of marquetry or inlay workpieces.
To create marquetry or inlay work using a drill press, secure the workpiece to the drill press table, ensuring it remains stable throughout the cutting and assembly process. Determine the design or pattern for the marquetry or inlay work and mark the corresponding locations on the workpiece. Use appropriate cutting tools such as scroll saw blades to cut out the small pieces that will be inserted. Attach the cutting tool to the drill press and adjust the speed and depth according to the material and cutting requirements. Carefully guide the workpiece against the cutting tool, moving it along the marked lines or patterns. Take care to maintain a steady hand and apply consistent pressure for accurate and clean cuts. Once the small pieces are cut, carefully insert them into the corresponding openings on the workpiece. Apply wood glue or other appropriate adhesives to secure the pieces in place. Use a drill press and appropriate clamping techniques to apply pressure to the assembled marquetry or inlay work until the glue sets. With the help of a drill press, you can easily and precisely create stunning marquetry or inlay work, adding intricate and decorative details to your woodworking projects.
Crafting Turned Objects on a Lathe Setup
A lathe is a versatile tool used to shape wood or other materials by rotating them against various cutting tools. A drill press, when used with appropriate attachments or accessories, can be transformed into a basic lathe setup for crafting turned objects.
To craft turned objects using a drill press as a lathe setup, secure the material to the drill press table, ensuring it remains stable throughout the turning process. Attach a lathe setup attachment or chuck to the drill press spindle, ensuring it is secure and aligned correctly. Adjust the speed according to the material and turning requirements. Turn on the drill press and carefully move the material against the rotating attachment or chuck. Use appropriate turning tools to shape and refine the material as it rotates. Take care to maintain a steady hand and apply consistent pressure for smooth and precise turning. Monitor your progress frequently, making adjustments as needed. Keep in mind that turning gradually and checking your progress frequently will yield the best results. With the help of a drill press and appropriate attachments or accessories, you can transform it into a basic lathe setup to craft turned objects, showcasing your woodworking skills and creativity.
We’ve covered a wide range of techniques and applications of a drill press in woodworking. From creating dowel joints to polishing metal surfaces, a drill press can be a highly versatile tool in your workshop. So, grab your drill press, unleash your creativity, and enjoy the process of woodworking!