Are you a DIY enthusiast looking to learn more about drill presses? Look no further! In this blog post, we will be exploring the world of drill press belt tensioning and replacement. Whether you are a seasoned pro or just starting out, understanding how to properly tension and replace the belt on your drill press is essential for achieving accurate and efficient drilling. With step-by-step instructions and helpful tips, we will guide you through the process, ensuring that your drill press is always in top-notch condition. So, grab your tools and let’s get started on this exciting adventure in drill press maintenance!
This image is property of i.ytimg.com.
Understanding Belt Tension
Importance of proper belt tension
Proper belt tension is crucial for the smooth and efficient operation of your drill press. When the belt is too loose, it can slip and cause a decrease in power transmission, resulting in poor performance and inaccurate results. On the other hand, if the belt is too tight, it can put unnecessary strain on the motor, leading to premature wear and potential damage. Maintaining the correct belt tension ensures optimal performance, longevity, and safety of your drill press.
Signs of incorrect belt tension
It’s essential to familiarize yourself with the signs that indicate incorrect belt tension. If you notice the drill press motor is straining or struggling to maintain speed, it could be a sign of excessive belt tension. On the other hand, if the drill press is experiencing slippage, where the motor is running but the drill bit is not turning as it should, it could indicate that the belt tension is too loose. Additionally, irregular wear patterns on the belt, excessive noise or squeaking, and visible damage are signs that your belt tension needs to be adjusted.
Determining the correct belt tension
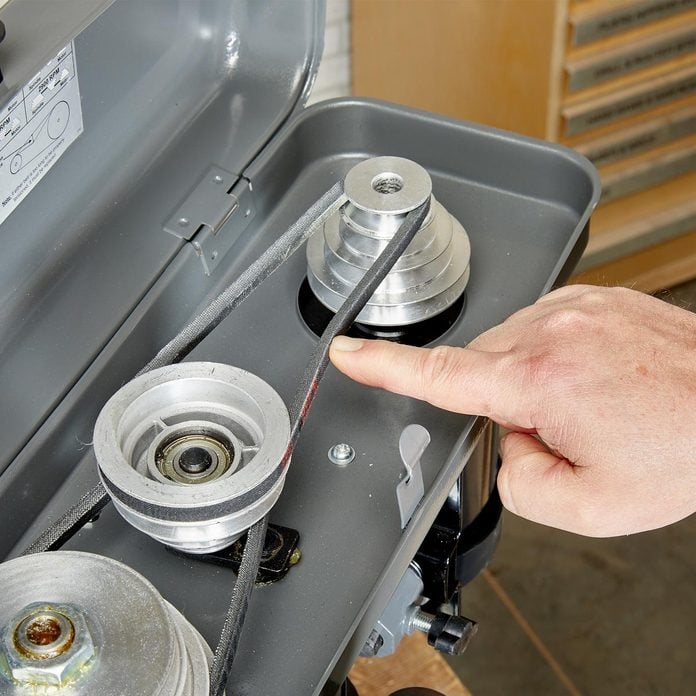
Determining the correct belt tension for your drill press requires understanding the manufacturer’s recommendations. Consult your drill press manual or reach out to the manufacturer for specific guidelines. In general, a properly tensioned belt should deflect around 1/4 inch when pressed firmly at the midpoint between the pulleys. This deflection allows for sufficient grip and power transmission while minimizing strain on the motor. Always refer to the manufacturer’s recommendations to ensure accurate belt tension.
Checking Belt Tension
Preparing the drill press
Before checking the belt tension, it’s important to ensure your drill press is in a safe and ready-to-use condition. Make sure the power is turned off and the machine is unplugged. Inspect the drill press for any loose or damaged parts and tighten or repair them as necessary. Clear any debris or obstructions from the working area to prevent accidents during the tensioning process.
Locating the belt tensioning mechanism
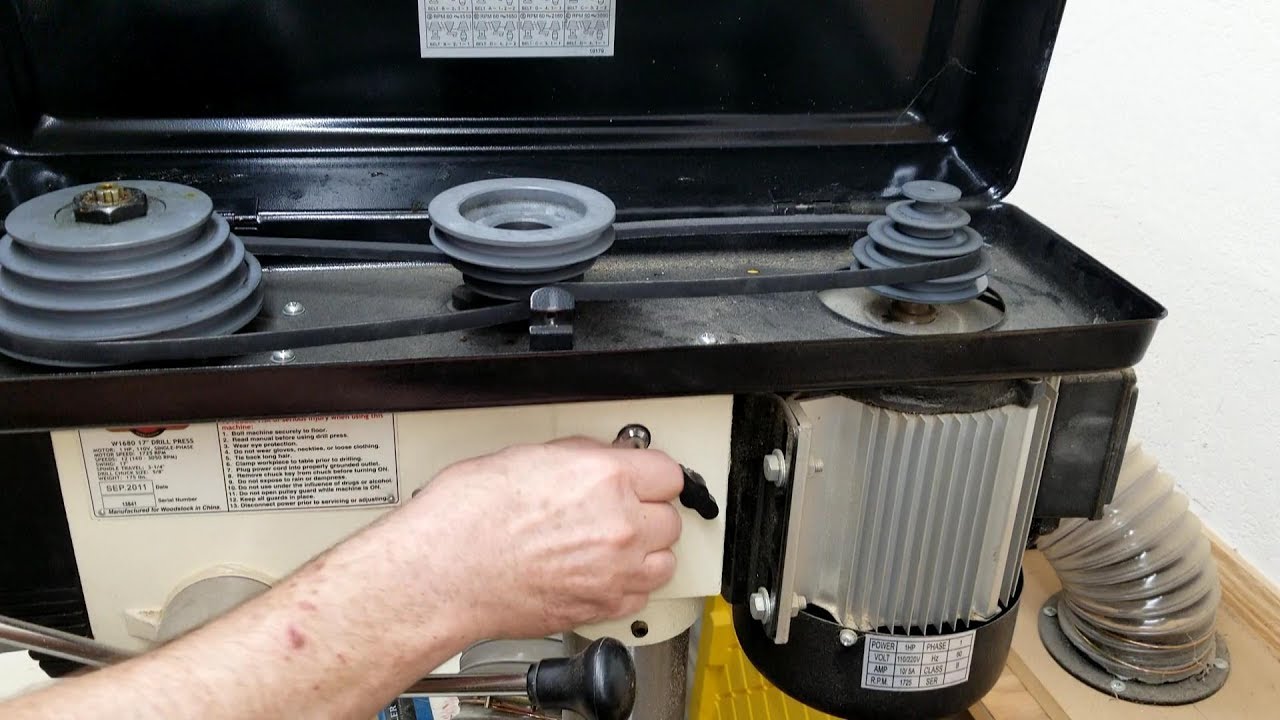
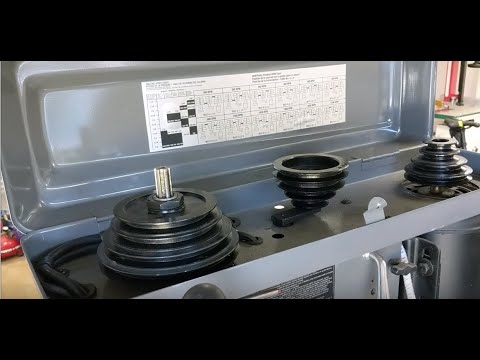
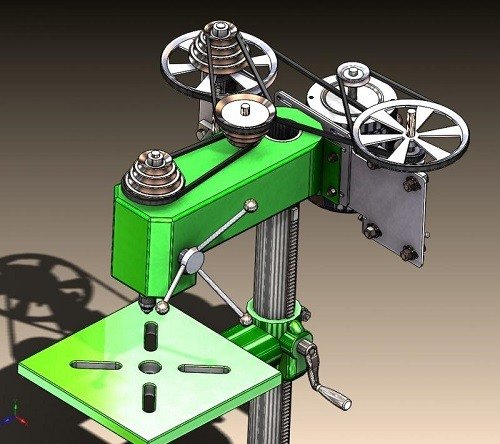
Different drill presses have varying mechanisms for adjusting belt tension. However, most drill presses have a tensioning mechanism located either on the motor or the upper pulley assembly. Refer to your drill press manual to find the specific location of the tensioning mechanism. It may involve loosening or tightening bolts, adjusting the position of pulleys, or using a specific tool provided with the drill press.
Inspecting the current tension
Once you’ve identified the belt tensioning mechanism, carefully examine the current tension of the belt. Check for signs of excessive tightness or looseness. Use your hand to press down on the belt midway between the pulleys and observe the deflection. If the belt is too tight or too loose according to the manufacturer’s guidelines, it’s time to adjust the tension.
Adjusting the tension if necessary
To adjust the tension of your drill press belt, follow the instructions provided in your drill press manual. Typically, this involves loosening specific bolts or adjusting the position of pulleys to increase or decrease tension. Make small adjustments at a time and check the belt tension after each adjustment. Remember to adhere to the manufacturer’s guidelines for the optimal belt tension. Once you’ve achieved the correct tension, tighten all the bolts securely.
This image is property of i.ytimg.com.
Tools Required for Belt Tensioning
Basic toolkit
To perform belt tensioning on your drill press, you’ll need a basic toolkit that includes essential hand tools such as wrenches, pliers, and screwdrivers. These tools will come in handy during the adjustment process.
Tension gauge (optional)
Although not necessary, a tension gauge can be a useful tool for accurately measuring the belt tension. A tension gauge allows you to gauge the deflection of the belt more precisely and ensure that it falls within the manufacturer’s recommendations. If you decide to use a tension gauge, refer to the manufacturer’s instructions for how to use it correctly.
Replacement belt (if necessary)
If the current belt is worn out, damaged or requires replacement, ensure you have a suitable replacement belt on hand. Make sure to determine the correct belt type and size before purchasing. Consult your drill press manual or contact the manufacturer for guidance on the appropriate replacement belt.
Replacing a Worn Belt
Determining the type of belt
Before replacing a worn-out belt, determine the type of belt your drill press requires. Refer to your drill press manual or contact the manufacturer for specific information. Belts can be made of various materials such as rubber, synthetic materials, or even metal, depending on the application and drill press model.
Removing the old belt
To remove the old belt, start by loosening the tension from the tensioning mechanism. This may involve loosening bolts, adjusting pulleys, or using specific release mechanisms as indicated in your drill press manual. Once the tension is released, carefully remove the old belt from the pulleys, taking note of its positioning for future reference.
Measuring the belt length
After removing the old belt, measure its length to ensure you select a suitable replacement. Place the belt on a flat surface and measure the circumference using a flexible measuring tape or a string that can be measured with a ruler. Ensure accuracy in your measurement to guarantee a proper fit for the replacement belt.
Selecting a replacement belt
Using the measurements obtained from the old belt, search for a replacement belt that matches the size and type specified by the manufacturer. Consult your local hardware store or contact the manufacturer for assistance in finding the correct replacement. It’s crucial to select a belt with similar characteristics to ensure proper functionality.
Installing the new belt
To install the new belt, refer to your drill press manual for specific instructions. Generally, it involves fitting the belt onto the pulleys, adjusting the tension as required, and securing the belt in place using the tensioning mechanism. Follow the manufacturer’s guidelines to ensure proper installation and tension adjustment.
Adjusting the tension of the new belt
After installing the new belt, check its tension and adjust it as necessary. Follow the same process mentioned earlier for checking and adjusting the belt tension. Ensure that the belt deflects appropriately when pressed at the midpoint between the pulleys.
This image is property of www.roguefab.com.
Maintenance Tips for Belt Longevity
Regular cleaning and lubrication
To ensure the longevity of your drill press belt, it’s important to keep it clean and properly lubricated. Dust, debris, and accumulated grime can negatively impact belt performance. Regularly clean the belt using a soft cloth or brush to remove any residue. Additionally, lubricate the pulleys and the tensioning mechanism as recommended by the manufacturer to reduce friction and facilitate smooth belt movement.
Inspecting for signs of wear
Regular inspection of the belt is essential to identify any signs of wear or damage early on. Check for fraying edges, cracks, glazing, or other visible signs of deterioration. If you notice any unusual wear patterns or potential issues, consult your drill press manual or contact the manufacturer for further guidance.
Protective measures during usage
While using your drill press, take necessary precautions to protect the belt from unnecessary wear and tear. Avoid excessive force or pressure when drilling, as it can strain the belt and lead to premature damage. Use appropriate cutting speeds and feeds for the specific material being drilled to avoid excessive stress on the belt.
Avoiding excessive tension
Ensure that the belt tension is within the manufacturer’s recommended range to prevent unnecessary strain on the belt and motor. Excessive tension can lead to premature belt wear, while insufficient tension can cause slippage and decreased power transmission. Regularly check and adjust the tension as needed to maintain optimal performance.
Common Belt Problems
Slippage
Slippage occurs when the drill press motor is running, but the belt fails to transfer power effectively to the pulley and the drill bit. Slippage is often an indication of improper belt tension. Check the tension of the belt and adjust it accordingly to eliminate slippage.
Noise or squeaking
Excessive noise or squeaking coming from your drill press can be an indication of belt problems such as improper tension or excessive wear. Inspect the belt for signs of damage and adjust the tension if necessary. If the noise persists, further investigation or professional assistance may be required.
Visible damage
Regularly inspect the belt for visible damage such as fraying edges, cracks, or glazing. Visible damage can impact the belt’s performance and lifespan. Replace the belt if necessary to ensure optimal functioning and prevent further damage to your drill press.
Uneven wear
Uneven wear patterns on the belt surface can indicate issues with the alignment or tension of the belt. Misalignment can cause one side of the belt to wear faster than the other, leading to inconsistent performance. Check the alignment and tension of the belt and make necessary adjustments to ensure even wear.

This image is property of content.instructables.com.
Importance of Proper Belt Replacement
Ensuring optimal performance
Proper belt replacement is essential for maintaining the optimal performance of your drill press. An incorrectly sized or poorly installed belt can significantly affect power transmission and accuracy. Always use the manufacturer-recommended replacement belt and follow the correct installation procedures to ensure the drill press operates at its best.
Preventing safety hazards
A worn-out or damaged belt poses a safety hazard. If the belt breaks while the drill press is in operation, it can lead to accidents and injuries. Regularly inspect the belt for signs of wear and replace it promptly to prevent any potential safety hazards.
Improving precision and accuracy
A well-maintained and properly tensioned belt ensures precise and accurate drilling. When the belt tension is correct, the drill press operates smoothly, minimizing any unwanted movements or vibrations. This translates to better precision and accuracy in your drilling tasks.
Seeking Professional Help
When to consult a professional
While many belt tensioning and replacement tasks can be completed by DIY enthusiasts, certain situations may require professional assistance. If you encounter complex issues, are unsure about the proper procedures, or lack the necessary tools, it’s advisable to consult a professional repair service. They have the expertise and experience to handle any intricate problems and ensure the optimal functioning of your drill press.
Choosing a reputable repair service
When selecting a professional repair service, it’s essential to choose a reputable provider. Look for reviews and recommendations, and inquire about their experience in working with drill presses. Ensure that they have the necessary certifications and qualifications to perform repairs and replacements. Additionally, consider their warranty policies and pricing structure to make an informed decision.
Cost considerations
The cost of seeking professional help for belt tensioning and replacement can vary depending on the complexity of the task and the repair service you choose. Inquire about the repair service’s pricing structure and any additional charges that may apply. Consider whether the cost of professional assistance outweighs the potential risks of incorrect DIY repairs.
This image is property of www.familyhandyman.com.
Frequently Asked Questions
How often should the belt tension be checked?
It’s recommended to check the belt tension regularly, especially when you notice any signs of slippage, noise, or visible damage. As a general rule, check the belt tension every few months or whenever you suspect an issue. Regular maintenance and periodic inspections can prevent potential problems and ensure the optimal performance of your drill press.
Can I use any belt as a replacement?
No, it’s crucial to use the correct replacement belt specified by the manufacturer. Different drill presses require specific belt types and sizes to ensure proper functionality. Using an incorrect belt can result in decreased performance, safety hazards, and potential damage to your drill press. Always consult your drill press manual or contact the manufacturer for assistance in selecting the appropriate replacement belt.
What if my drill press doesn’t have a belt tensioning mechanism?
If your drill press lacks a belt tensioning mechanism, it may require an alternative method for adjusting the belt tension or rely on fixed tension. In such cases, refer to your drill press manual or contact the manufacturer for guidance on how to ensure the correct tension without a dedicated mechanism. Professional assistance may be needed to modify the drill press or find a suitable workaround.
How do I know if the belt has stretched?
Over time, belts can stretch and lose their original tension. If you suspect the belt has stretched, refer to the manufacturer’s guidelines for the correct tension. Use a tension gauge or follow the deflection test described earlier in this article to check if the belt meets the specified requirements. If the deflection is excessive, it’s an indication that the belt has stretched and needs to be readjusted or replaced.
Conclusion
Regularly checking and maintaining the belt tension of your drill press is crucial for optimal performance, accuracy, and safety. Understanding the importance of proper belt tension, recognizing the signs of incorrect tension, and knowing how to determine the correct tension are essential skills for any DIY enthusiast. By following the recommended steps for checking and adjusting the belt tension, as well as practicing proper maintenance and replacement techniques, you can ensure the longevity and effective operation of your drill press. Take pride in caring for your drill press, and it will continue to be your reliable tool for all your drilling needs.