If you’re a DIY enthusiast and find yourself frustrated with common drill press issues, this article is here to help. Whether you’re experiencing wobbling, inaccurate drilling depths, or difficulty holding your workpiece securely, we’ve got you covered. With practical solutions and handy tips, you’ll soon be able to tackle any problem that comes your way. Say goodbye to frustration and hello to a smoother drilling experience with these troubleshooting techniques. Get ready to enhance your DIY skills and make the most out of your drill press!
Troubleshooting Common Drill Press Issues
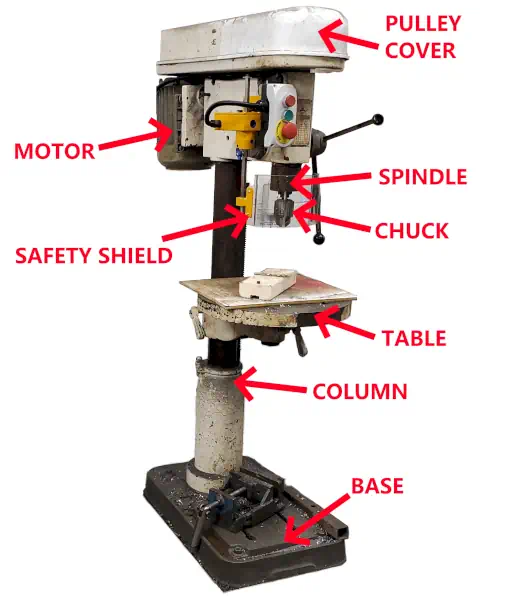
Drill presses are versatile tools that are commonly used in DIY projects and professional woodworking shops. They provide precision and power, allowing you to drill accurately and efficiently. However, like any other tool, drill presses can encounter issues that may hinder their performance. In this article, we will discuss some of the most common problems that you may encounter with your drill press and provide troubleshooting solutions.

This image is property of www.bds-machines.com.
1. Motor Malfunctions
1.1 Motor not starting
If your drill press motor fails to start, there could be a few reasons behind it. First, check if the power cord is securely plugged into a functioning outlet. If it is, ensure that the power switch is turned on. If the motor still does not start, inspect the circuit breaker or fuse to see if it has tripped or blown. Reset the breaker or replace the fuse if necessary. If the problem persists, there may be an issue with the motor itself. In such cases, it is best to consult a professional for further assistance.
1.2 Motor overheating
Overheating of the motor is a common issue that can occur during prolonged use or when the motor is under excessive load. To prevent motor overheating, make sure to give the motor sufficient breaks in between drilling tasks and avoid pushing the tool beyond its capacity. Additionally, ensure that the drill press is placed in a well-ventilated area to allow for proper airflow and cooling. If the motor continues to overheat, consider checking the internal cooling fan, as it may be clogged with debris. Cleaning or replacing the fan can help resolve the issue.
1.3 Motor making strange noises
Unusual noises coming from the motor can indicate mechanical problems. If you notice grinding, clanking, or squealing sounds, it may be due to worn-out bearings or misalignment of motor components. In such cases, it is best to have a professional inspect and repair the motor. Continuing to operate the drill press with a noisy motor can lead to further damage and potential safety hazards.
2. Belt and Pulley Problems
2.1 Slipping belt
If you notice the drill press belt slipping or not transferring power effectively, it may need to be tightened or replaced. Check the tension of the belt by pressing on it gently. Ideally, the belt should have some give but not be overly loose. Adjust the tension by either loosening or tightening the belt tensioning mechanism. If the belt is worn or damaged, replace it with a new one of the same size and type as recommended by the manufacturer.
2.2 Misaligned pulleys
Misaligned pulleys can lead to inefficient power transfer and cause further issues with belt slipping. To check if the pulleys are aligned correctly, turn off the drill press and manually rotate the pulleys. If they appear to be misaligned, consult the drill press manual for instructions on adjusting the pulley alignment. This may involve loosening and repositioning the pulley set screws or making other adjustments as recommended by the manufacturer.
2.3 Worn-out pulley
Over time, the pulleys on your drill press may become worn or damaged due to regular use. If you notice signs of wear, such as cracks, chips, or deformation, it is essential to replace the pulleys. Using worn-out pulleys can lead to further belt slipping, decreased power transmission, and even belt breakage. Contact the manufacturer or a reputable supplier to obtain the correct replacement pulleys for your drill press model.
This image is property of www.popularwoodworking.com.
3. Spindle and Chuck Issues
3.1 Spindle not rotating
If the spindle fails to rotate when the motor is running, there may be a problem with the spindle assembly. Start by checking if the belt is properly connected between the motor and the spindle. If the belt is intact, examine the spindle components for any signs of damage or obstruction. Clear away any debris or blockages that may be preventing the spindle from rotating freely. If the issue persists, it is recommended to seek professional assistance for further inspection and repair.
3.2 Chuck not gripping drill bits
A common problem with drill presses is the chuck failing to grip drill bits securely. This can result in the bit slipping or wobbling during drilling, leading to inaccurate holes. If you experience this issue, check if the chuck keys or jaws are tightened securely around the drill bit. If they are loose, use the chuck key to tighten them firmly. Ensure that the chuck key is removed from the chuck before starting the drill press. If tightening the chuck does not resolve the problem, the chuck mechanism may be worn-out or damaged, requiring replacement.
3.3 Excessive runout in the chuck
Runout refers to the movement or wobble of the chuck and drill bit when the spindle is rotating. Excessive runout can result in imprecise holes and reduced drilling accuracy. To check for runout, attach a dial indicator to the spindle and position it against a fixed point on the drill press frame. Rotate the spindle and observe the dial indicator reading. If the runout exceeds the manufacturer’s specifications, it may be necessary to replace the chuck or have it professionally repaired.
4. Depth Adjustment Troubles
4.1 Depth stop not working
The depth stop on a drill press is designed to limit the depth of the hole being drilled. If the depth stop fails to work, it may be due to a loose or misaligned stop rod. Inspect the stop rod to ensure it is securely fastened and properly aligned with the depth scale. Adjust the stop rod as necessary, following the instructions in the drill press manual. If the depth stop continues to malfunction, there may be an issue with the internal mechanisms, requiring professional repair.
4.2 Depth scale inaccurate
The depth scale on a drill press allows you to set the desired drilling depth. If the depth scale is inaccurate, it can lead to holes that are either too shallow or too deep. To check the accuracy of the depth scale, use a caliper or depth gauge to measure the actual depth of holes drilled at various scale settings. If there is a significant discrepancy between the depth scale and the measured depth, recalibrate the scale following the instructions provided in the drill press manual.
4.3 Depth adjustment mechanism jammed
If the depth adjustment mechanism becomes jammed or difficult to operate, it may be due to debris or lack of lubrication. Start by cleaning the depth adjustment components, removing any dust or debris that may be hindering their movement. If the mechanism remains stuck, apply a small amount of lubricant to the moving parts as recommended by the manufacturer. Avoid using excessive amounts of lubricant, as it can attract more debris and lead to further issues.
This image is property of content.instructables.com.
5. Table and Fence Problems
5.1 Table not level
A level table is crucial for accurate drilling and ensuring the stability of the workpiece. If your drill press table is not level, it may be due to loose table adjustment screws or misalignment of the table components. Adjust the table by loosening the adjustment screws and using a level to check for parallelism with the drill bit. Once the table is leveled, tighten the adjustment screws securely. If the table remains unlevel, it may be necessary to consult a professional for further inspection and repair.
5.2 Fence misaligned
The fence on a drill press helps to guide and support the workpiece during drilling. If the fence is misaligned, it can cause the workpiece to drift off course, resulting in inaccurate holes. To correct the fence alignment, loosen the fence adjustment screws and adjust the fence position parallel to the drill bit. Use a square to ensure that the fence is perpendicular to the table surface. Once the alignment is correct, retighten the adjustment screws firmly.
5.3 Table and fence not square to the spindle
It is essential for both the drill press table and fence to be square to the spindle to achieve accurate drilling angles. To check the squareness, use a square against both the table surface and the fence. If they are not square, adjust the respective components using the adjustment screws provided. Be sure to check the squareness after making adjustments and repeat the process until both the table and fence are perpendicular to the spindle.
6. Slipping or Stuck Feed Handle
6.1 Feed handle slipping while drilling
If the feed handle slips or spins during drilling, it may be due to a loose handle or worn-out feed mechanism. Start by checking if the handle is tightly secured to the feed shaft. If it is loose, tighten it using the appropriate fasteners provided. If the handle is secure, the feed mechanism may be worn or damaged, requiring replacement. Contact the manufacturer or a professional for assistance in obtaining the correct replacement parts.
6.2 Feed handle jammed or difficult to turn
A feed handle that is jammed or difficult to turn can be frustrating and can hinder your drilling progress. The most common cause of a jammed feed handle is a buildup of debris or lack of lubrication. Clean the feed handle and feed mechanism thoroughly, removing any dust or debris that may be causing the jam. Apply a light amount of lubricant to the moving parts as recommended by the manufacturer. If the feed handle continues to be jammed, consult a professional for further inspection and repair.
This image is property of www.ferndalesafety.com.
7. Speed Control Difficulties
7.1 Speed control not working
Drill presses typically feature speed control mechanisms that allow you to adjust the rotational speed of the spindle. If the speed control fails to work, it may be due to a faulty switch or wiring issue. Check if the power switch is functioning correctly and if the speed adjustment knob is properly connected to the internal mechanisms. If the problem persists, it is best to consult a professional to ensure accurate diagnosis and repair.
7.2 Speed changing unexpectedly
If the speed of your drill press changes unexpectedly during operation, it may indicate a problem with the speed adjustment mechanism. Check if the speed adjustment knob or lever is properly engaged with the internal mechanisms. Ensure that it is securely locked into the desired speed setting. If the speed continues to change unintentionally, there may be an issue with the internal components, requiring professional repair.
7.3 Speed adjustment mechanism malfunctioning
A malfunctioning speed adjustment mechanism can result in difficulty in changing the speed or complete failure of speed control. If you encounter this issue, inspect the speed adjustment components for any signs of damage or obstruction. Clear away any debris or blockages that may be preventing the mechanism from operating correctly. If the problem persists, seek professional assistance for further inspection and repair.
8. Quill and Chuck Runout
8.1 Excessive runout in the quill
The quill of a drill press should rotate with minimal runout to ensure precise drilling. Excessive runout can result from worn-out quill bearings or misalignment of the quill components. To address this issue, it is recommended to have a professional inspect and repair the quill assembly. Attempting to correct quill runout without proper knowledge or tools may lead to further damage or injury.
8.2 Chuck wobbling during drilling
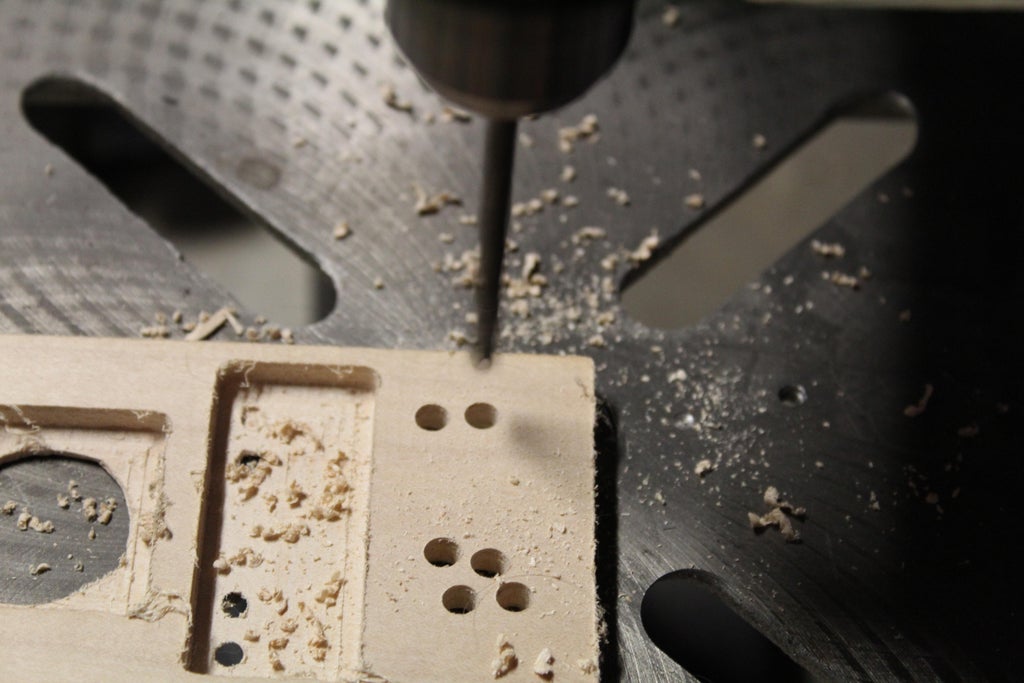
A wobbling chuck can affect drilling accuracy and pose a safety risk. If you notice the chuck wobbling while the spindle is rotating, it may be due to a loose or damaged chuck mechanism. Start by checking if the chuck is securely fastened to the quill. If it is loose, use the chuck key to tighten it securely. If tightening the chuck does not resolve the issue, there may be internal damage or wear to the chuck mechanism. In such cases, it is best to consult a professional for further inspection and repair.
This image is property of content.instructables.com.
9. Safety Switch Issues
9.1 Safety switch not engaging
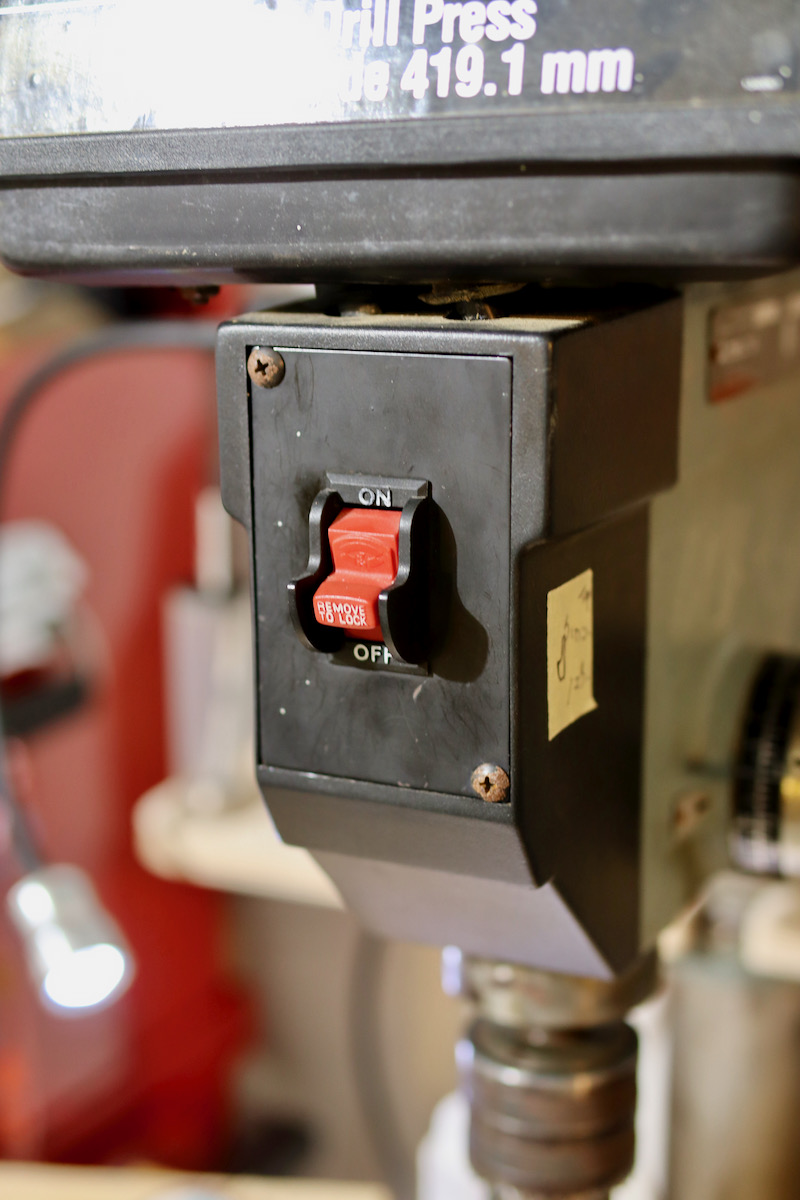
The safety switch on a drill press is designed to prevent accidental or unauthorized activation. If the safety switch fails to engage or disengage properly, it can hinder the normal operation of the drill press. Check if there are any debris or obstructions preventing the switch from functioning correctly. Clean the switch area thoroughly and ensure that it is free from any blockages. If the safety switch still does not engage, consult the drill press manual or a professional for further guidance.
9.2 Safety switch interfering with normal operation
Sometimes, the safety switch on a drill press may hinder the regular operation, making it difficult to use the tool effectively. If you experience this issue, review the manual or consult a professional to understand the correct procedure for using the safety switch in conjunction with the drill press. It is essential to follow proper safety protocols and understand how to operate the safety switch for seamless and safe drilling.
9.3 Safety switch getting stuck
A safety switch that gets stuck can be both inconvenient and potentially dangerous. If your safety switch becomes jammed or difficult to operate, inspect it for any debris or damage that may be causing the issue. Clean the switch thoroughly and ensure that it moves freely and smoothly. If the problem persists, consult a professional for further inspection and repair to ensure that the safety switch functions reliably.
10. Maintenance and Lubrication Problems
10.1 Lack of regular maintenance
Like any other power tool, drill presses require regular maintenance to ensure optimal performance and longevity. Neglecting proper maintenance can lead to increased wear, reduced accuracy, and a higher risk of malfunctions. Regularly inspect your drill press for any signs of wear, damage, or loose parts. Clean the tool after each use and remove any debris or dust that may have accumulated. Follow the manufacturer’s recommendations for lubrication and maintain a regular schedule for lubricating the moving parts.
10.2 Inadequate lubrication
Proper lubrication is crucial for the smooth operation and longevity of a drill press. Insufficient lubrication can lead to increased friction, wear, and eventually, component failure. Refer to the drill press manual for the recommended lubrication points and use the appropriate lubricant as specified. Apply lubricant sparingly and avoid over-lubrication, as it can attract more dirt and debris. Regularly check and replenish the lubricant as needed to ensure optimal performance.
10.3 Incorrect lubrication
Using the wrong type of lubricant or applying it to inappropriate areas can cause more harm than good. Different components of the drill press may require different types of lubricants, such as grease, oil, or dry lubricants. Consult the drill press manual or contact the manufacturer to obtain the correct lubrication recommendations. Applying the wrong lubricant or using excessive amounts can lead to damage, reduced performance, and potential safety hazards.
In conclusion, encountering issues with your drill press is not uncommon, but with proper troubleshooting and maintenance, most problems can be resolved. By following the guidelines provided in this article, you can effectively troubleshoot and address common drill press issues such as motor malfunctions, belt and pulley problems, spindle and chuck issues, depth adjustment troubles, table and fence problems, slipping or stuck feed handle, speed control difficulties, quill and chuck runout, safety switch issues, and maintenance and lubrication problems. Remember to refer to the drill press manual for specific instructions and always prioritize safety when working with power tools. Happy drilling!